HOW TO INTERFACE LCD SCREEN WITH ARDUINO USING I2C LCD DRIVER MODULE
4 comments
Using the I2C LCD (Liquid Crystal Display) Driver Module helps in saving the number of pins required to connect or interface an LCD screen to a microcontroller and makes the connection neat and well intact. LCD screen comes in different sizes such as 16x2, 20x4, etc. They are named based on the number of rows and columns the LCD has. For instance, the 16x2 LCD screen has 16 columns and 2 rows and the same goes for 20x4 which has 20 columns and 4 rows, and so on.
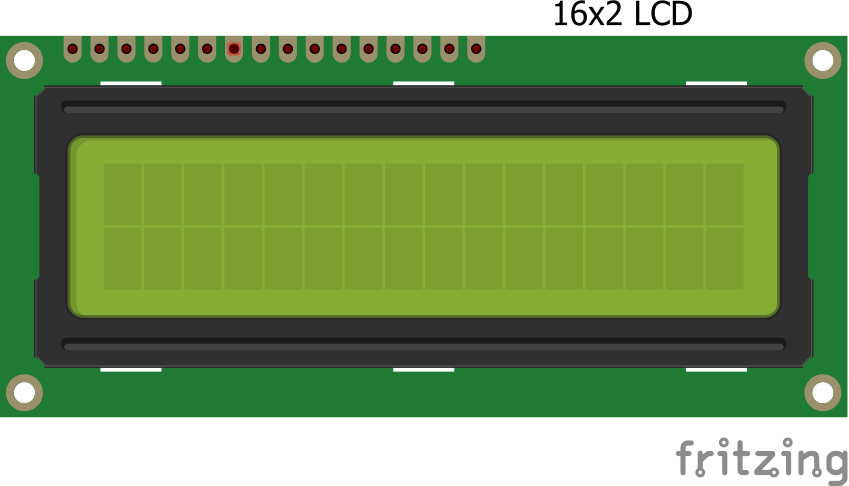
By Default, these LCD screens have 16 connection pins as shown in the image above, which are to be used to connect them to a microcontroller or areas where a display screen is needed in electronics devices or projects. In the case of Arduino Uno, the LCD uses 7 of its digital pins which are up to half of all the digital pins an Arduino Uno has. But with the help of the I2C LCD driver module, just 4 pins would be used, that is 2 power pins and 2 communication pins. The contrast of the LCD screen can be changed by varying the blue variable resistor on the I2C LCD driver module. The image of a typical I2C LCD driver module is shown below:
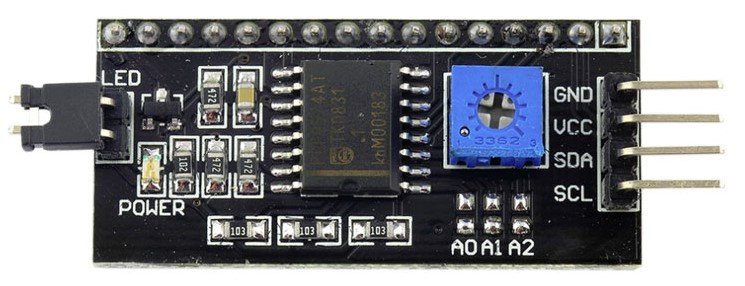
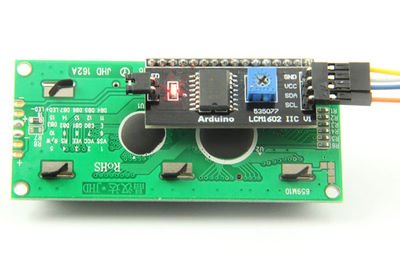
The I2C LCD driver module has 16 pins that connect directly to the 16 pins of the 16x2 LCD screen as shown in the image below and also has 4 pins that connect to the Arduino Uno microcontroller which 2 pins are for power the GND and VCC while the other 2 are the I/O pins or communication pins which is the SDA and SCL.
Different Arduino Boards have their SDA and SCL pins which are referred to as I2C pins located on a different side of the board.
As for Arduino Uno which is the case study, the A4 pin is the SDA and the A5 pin is its SCL respectively. The SDA and SCL pins of other common Arduino boards are given in the table below:
| Arduino Uno | Arduino Nano | Arduino Mega | |
|---|---|---|---|
| SDA | A4 | A4 | 20 |
| SCL | A5 | A5 | 21 |
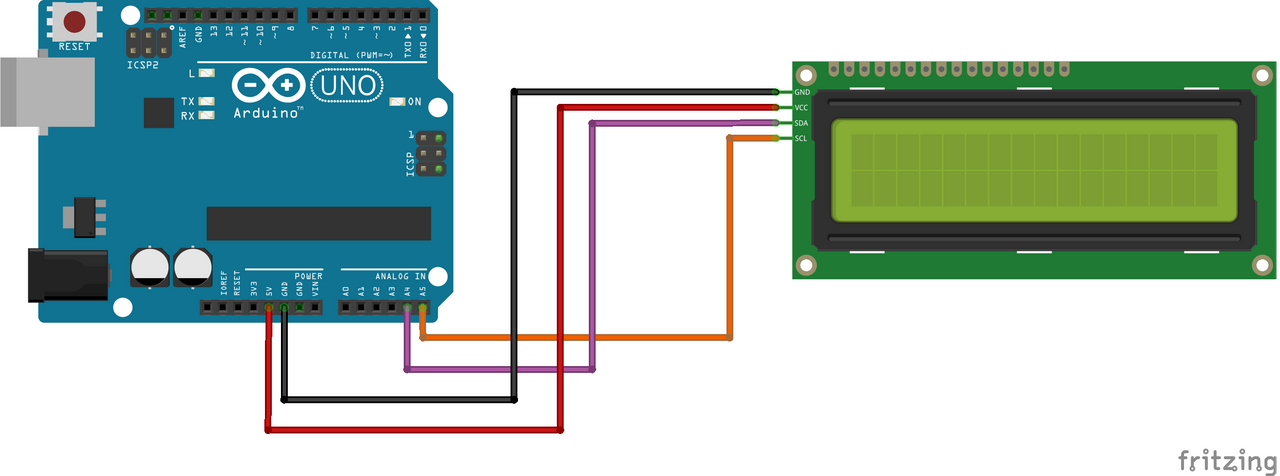
The circuit diagram of how to interface 16x2 LCD screen with Arduino Uno Board using I2C LCD Driver Module is shown below:

After making necessary connections following the instructions discussed above the next thing is to program the Arduino Uno board to write or display messages or texts on the 16x2 LCD screen.
First of all, the LiquidCrystal I2C library has to be installed following the instructions below:
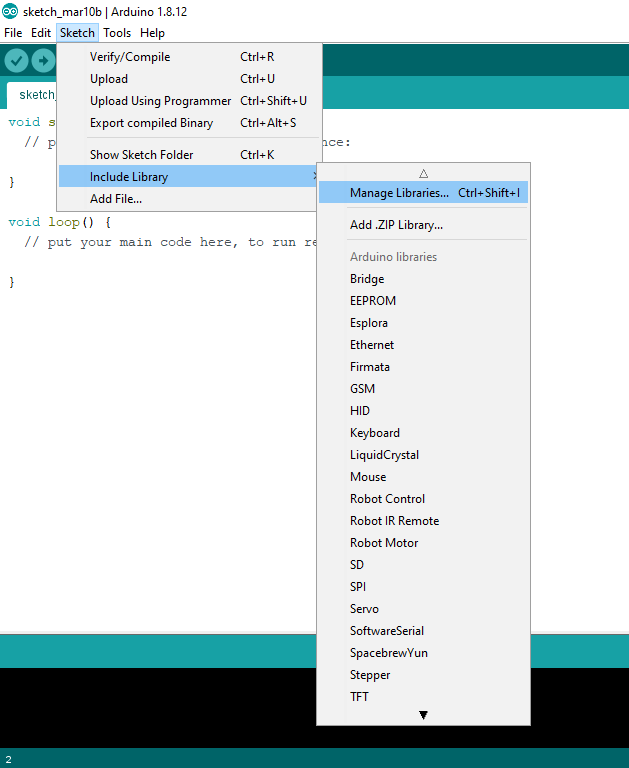
Click on Sketch tab at the top part of the Arduino IDE (Integrated Development Environment), then click on Include Library followed by Manage Libraries as shown in the image above.
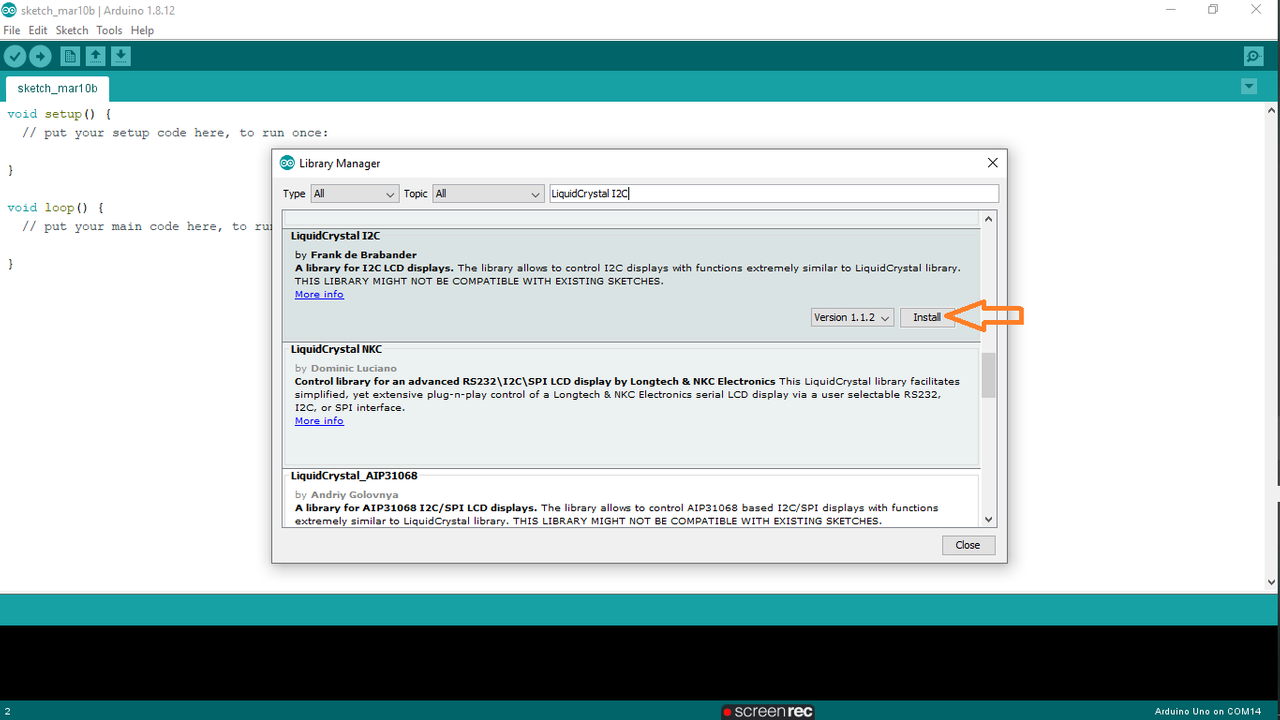
On clicking on Manage Libraries, search for LiquidCrystal I2C as shown in the image directly above. Then install the LiquidCystal I2C by Frake de Brabander.
After successful installation of the LiquidCystal I2C library, then the code below can be used to program the arduino uno to display messages or write on the LCD screen.
The code is well commented to explain what goes on in each lines in order to understand its purpose and need.
#include <LiquidCrystal_I2C.h>

// set the LCD number of columns and rows
int lcdColumns = 16;
int lcdRows = 2;

// set LCD address, number of columns and rows
// if you don't know your display address, run an I2C scanner sketch
LiquidCrystal_I2C lcd(0x27, lcdColumns, lcdRows);

void setup(){
  // initialize LCD
  lcd.init();
  // turn on LCD backlight
  lcd.backlight();
}

void loop(){
  // set cursor to first column, first row
  lcd.setCursor(0, 0);
  // print message
  lcd.print("Hello, World!");
  delay(1000);
  // clears the display to print new message
  lcd.clear();
  // set cursor to first column, second row
  lcd.setCursor(0,1);
  lcd.print("Hello, World!");
  delay(1000);
  lcd.clear();
}
Thanks for reading and visiting my blog 🤝. If you find this post interesting or beneficial kindly help or support it by reblogging, upvoting, and commenting, it would be highly appreciated.
Posted with STEMGeeks
Comments