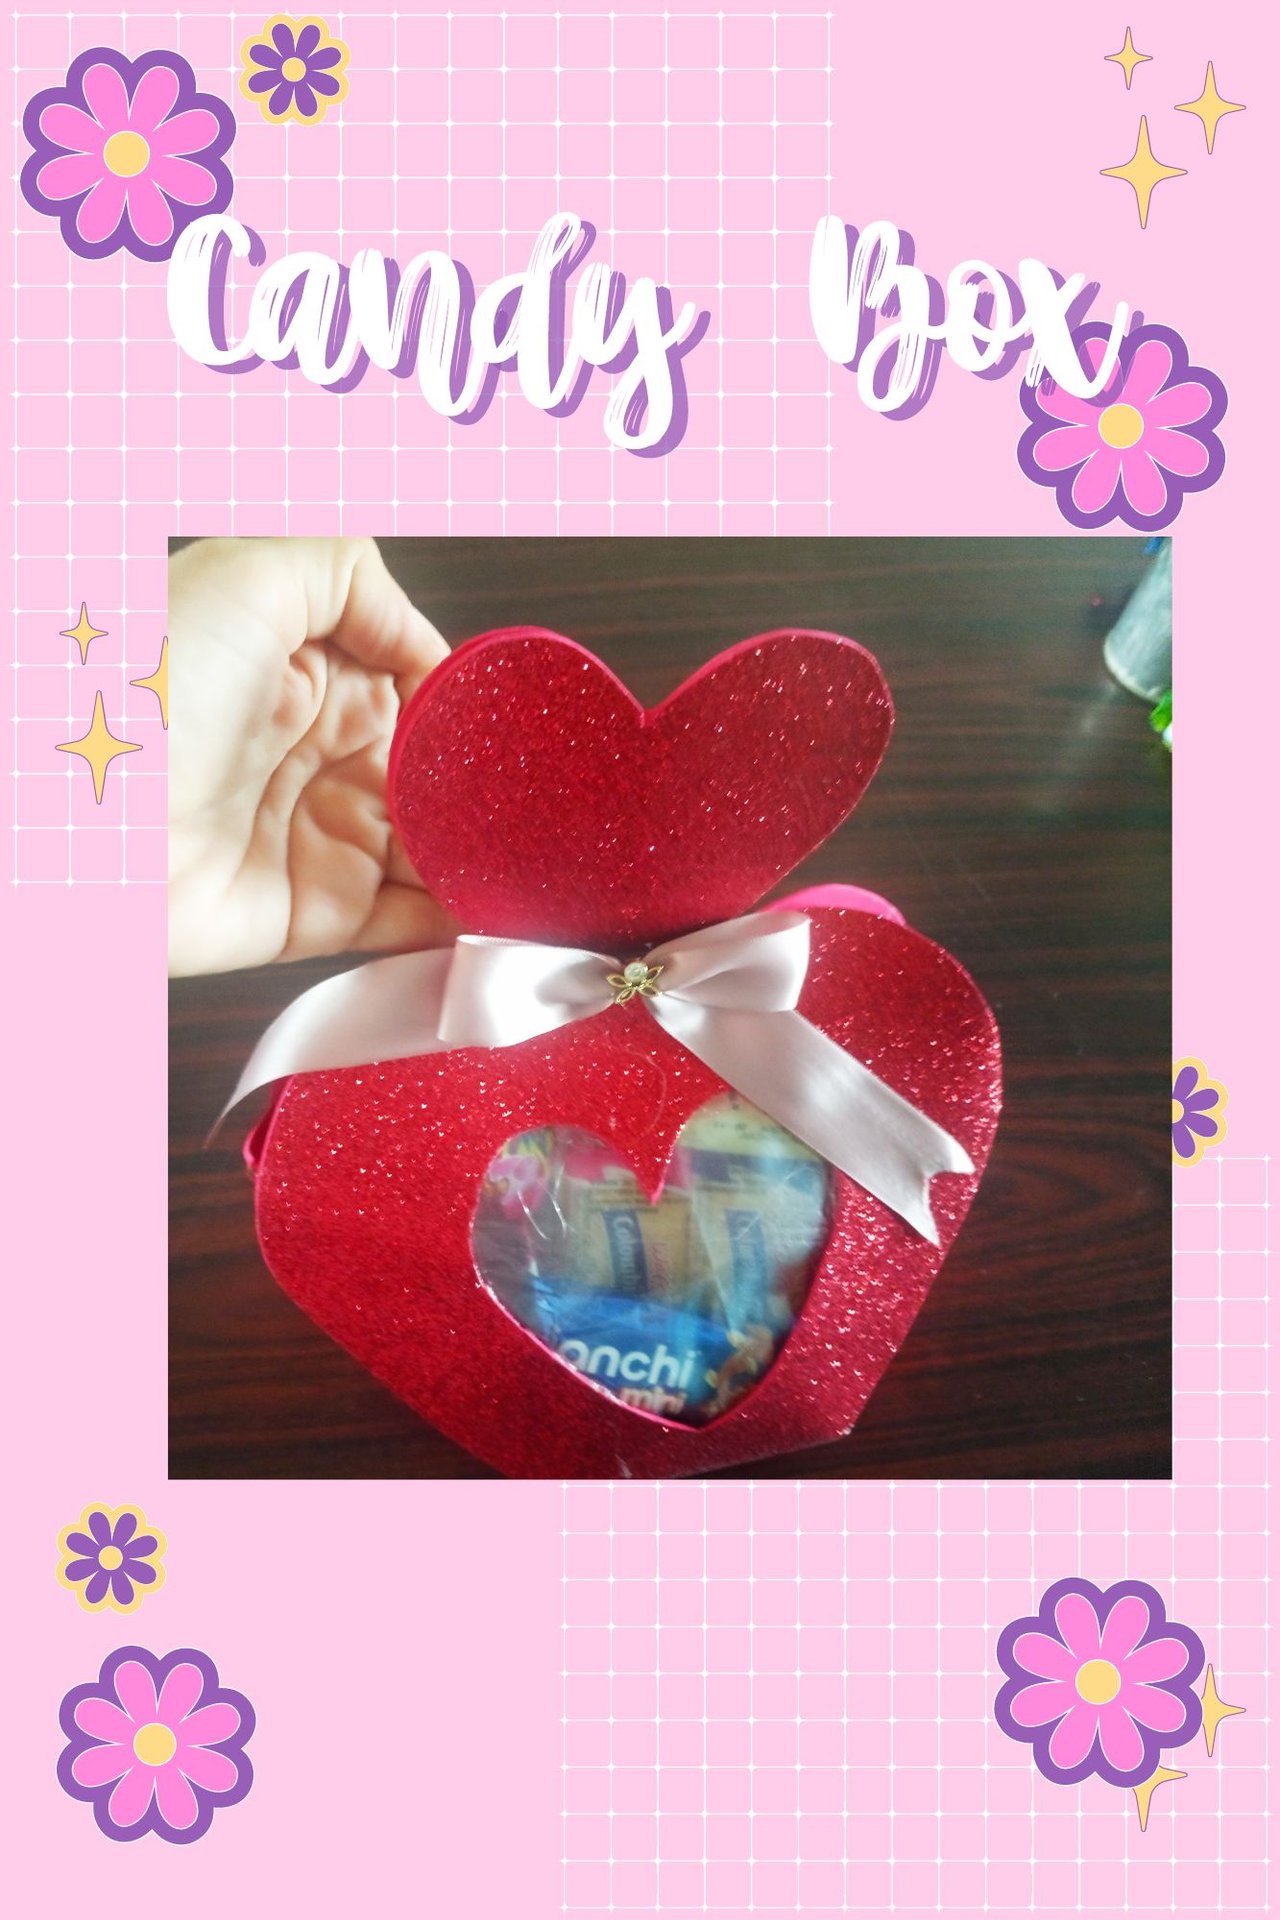
EN/ ES Cotillion gift idea. Idea de cotillon para regalar.
11 comments
English

Materials
A large sheet of foami
Scissors
A satin ribbon
An applique
Silicone, silicon gun.
thread
rule
Pattern
A cover or acetate
Candy to fill in.
A marker for marking
Procedure
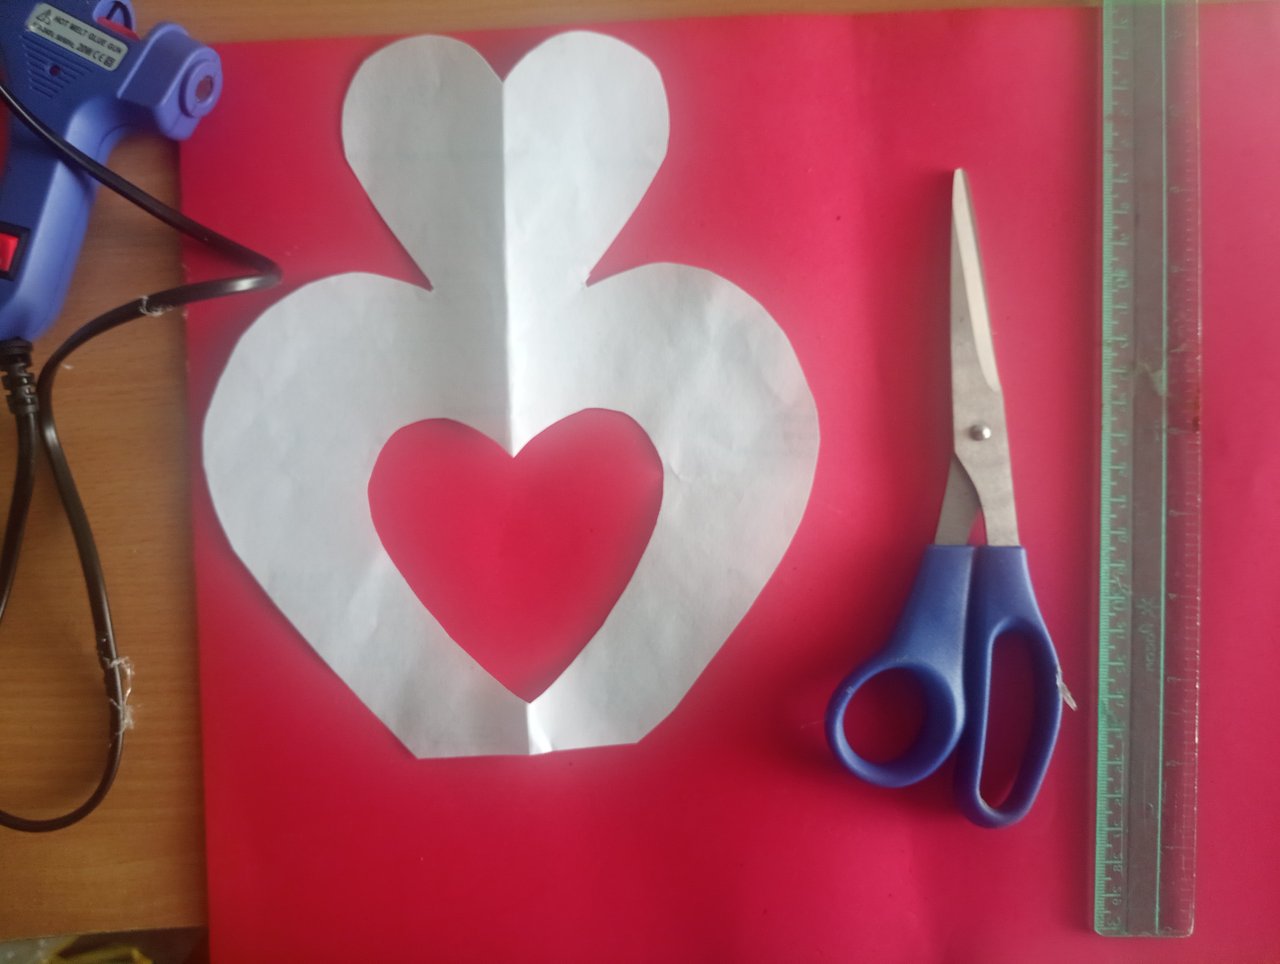
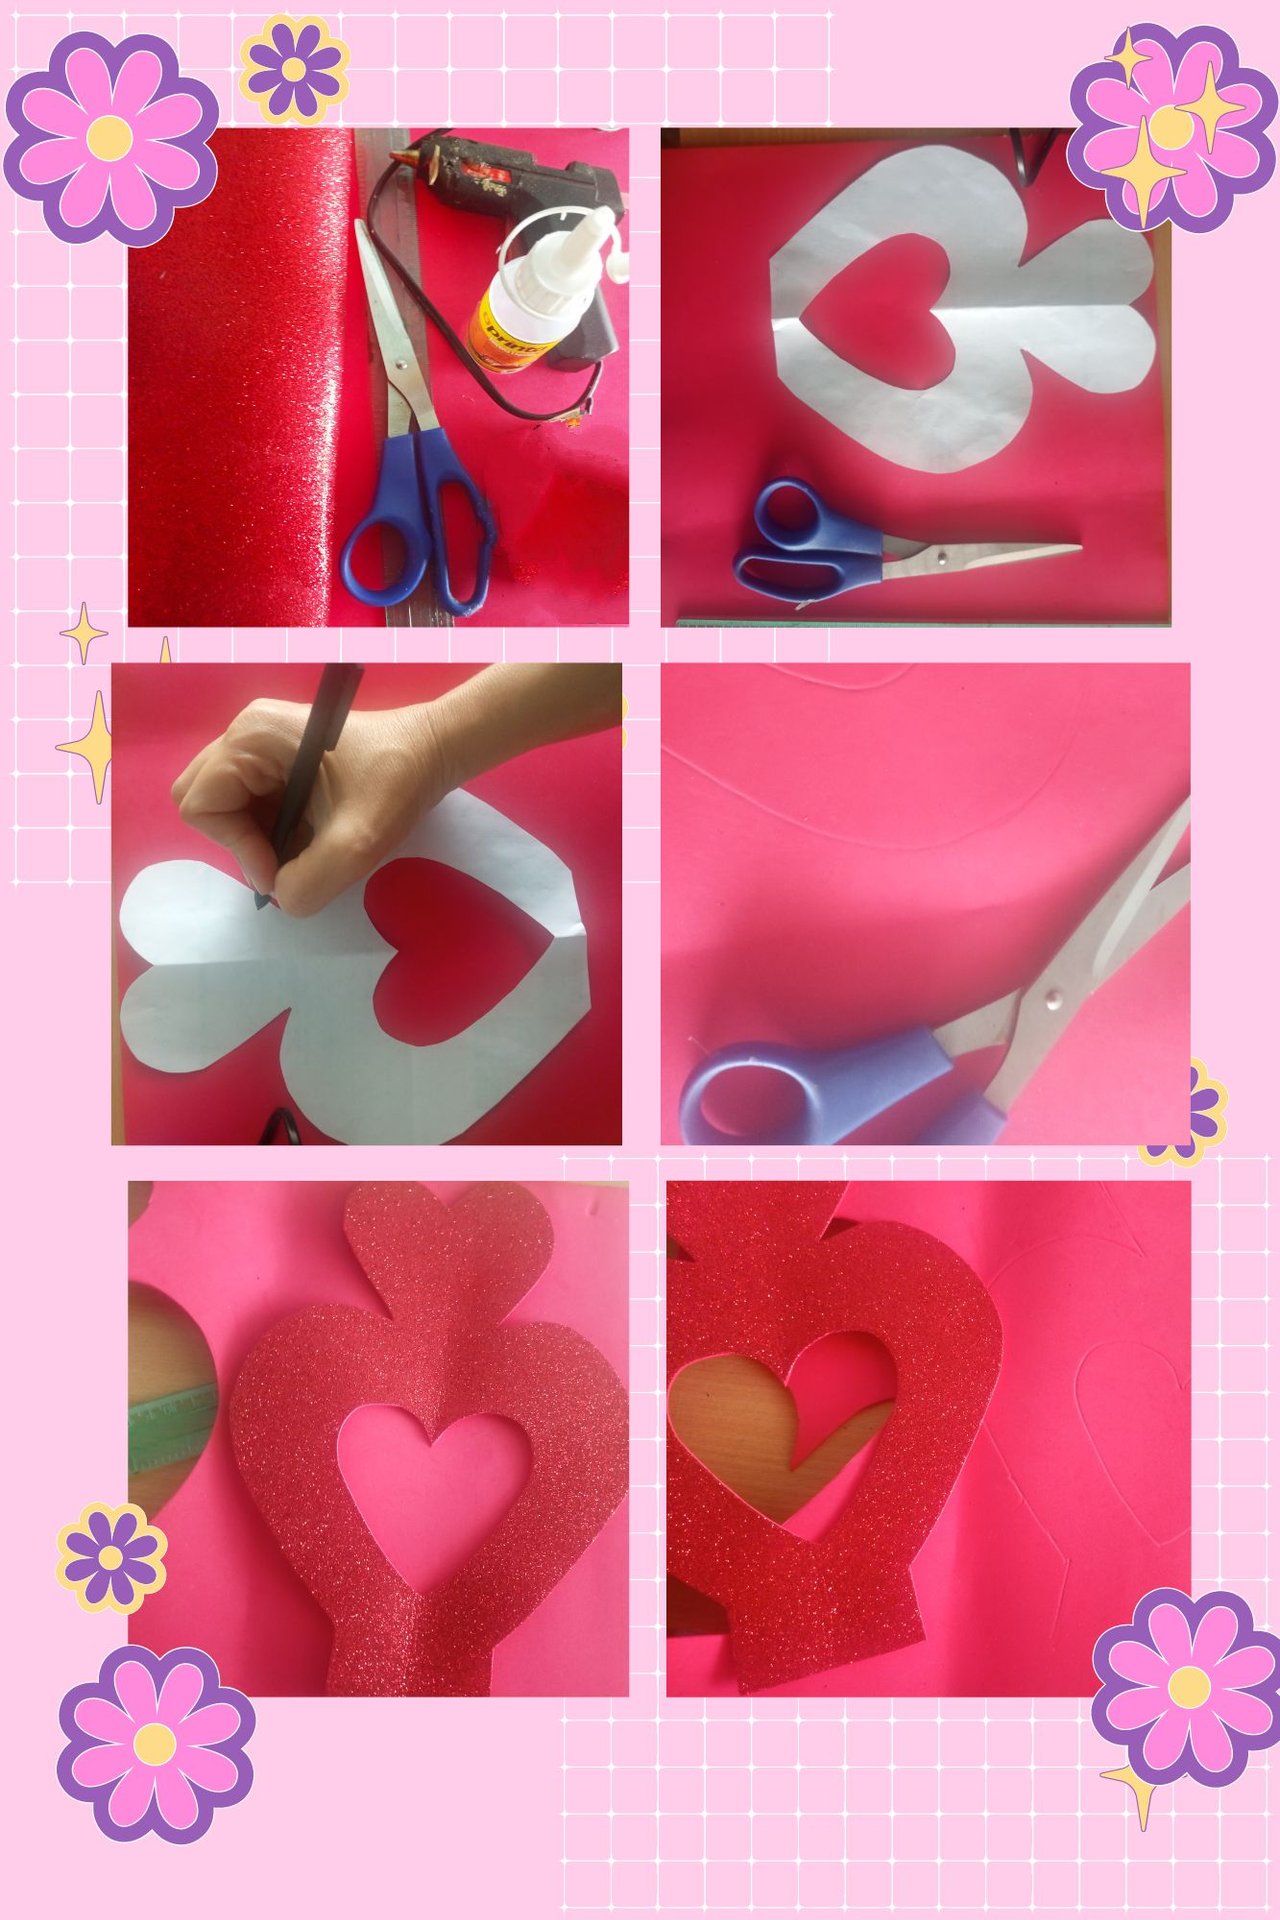
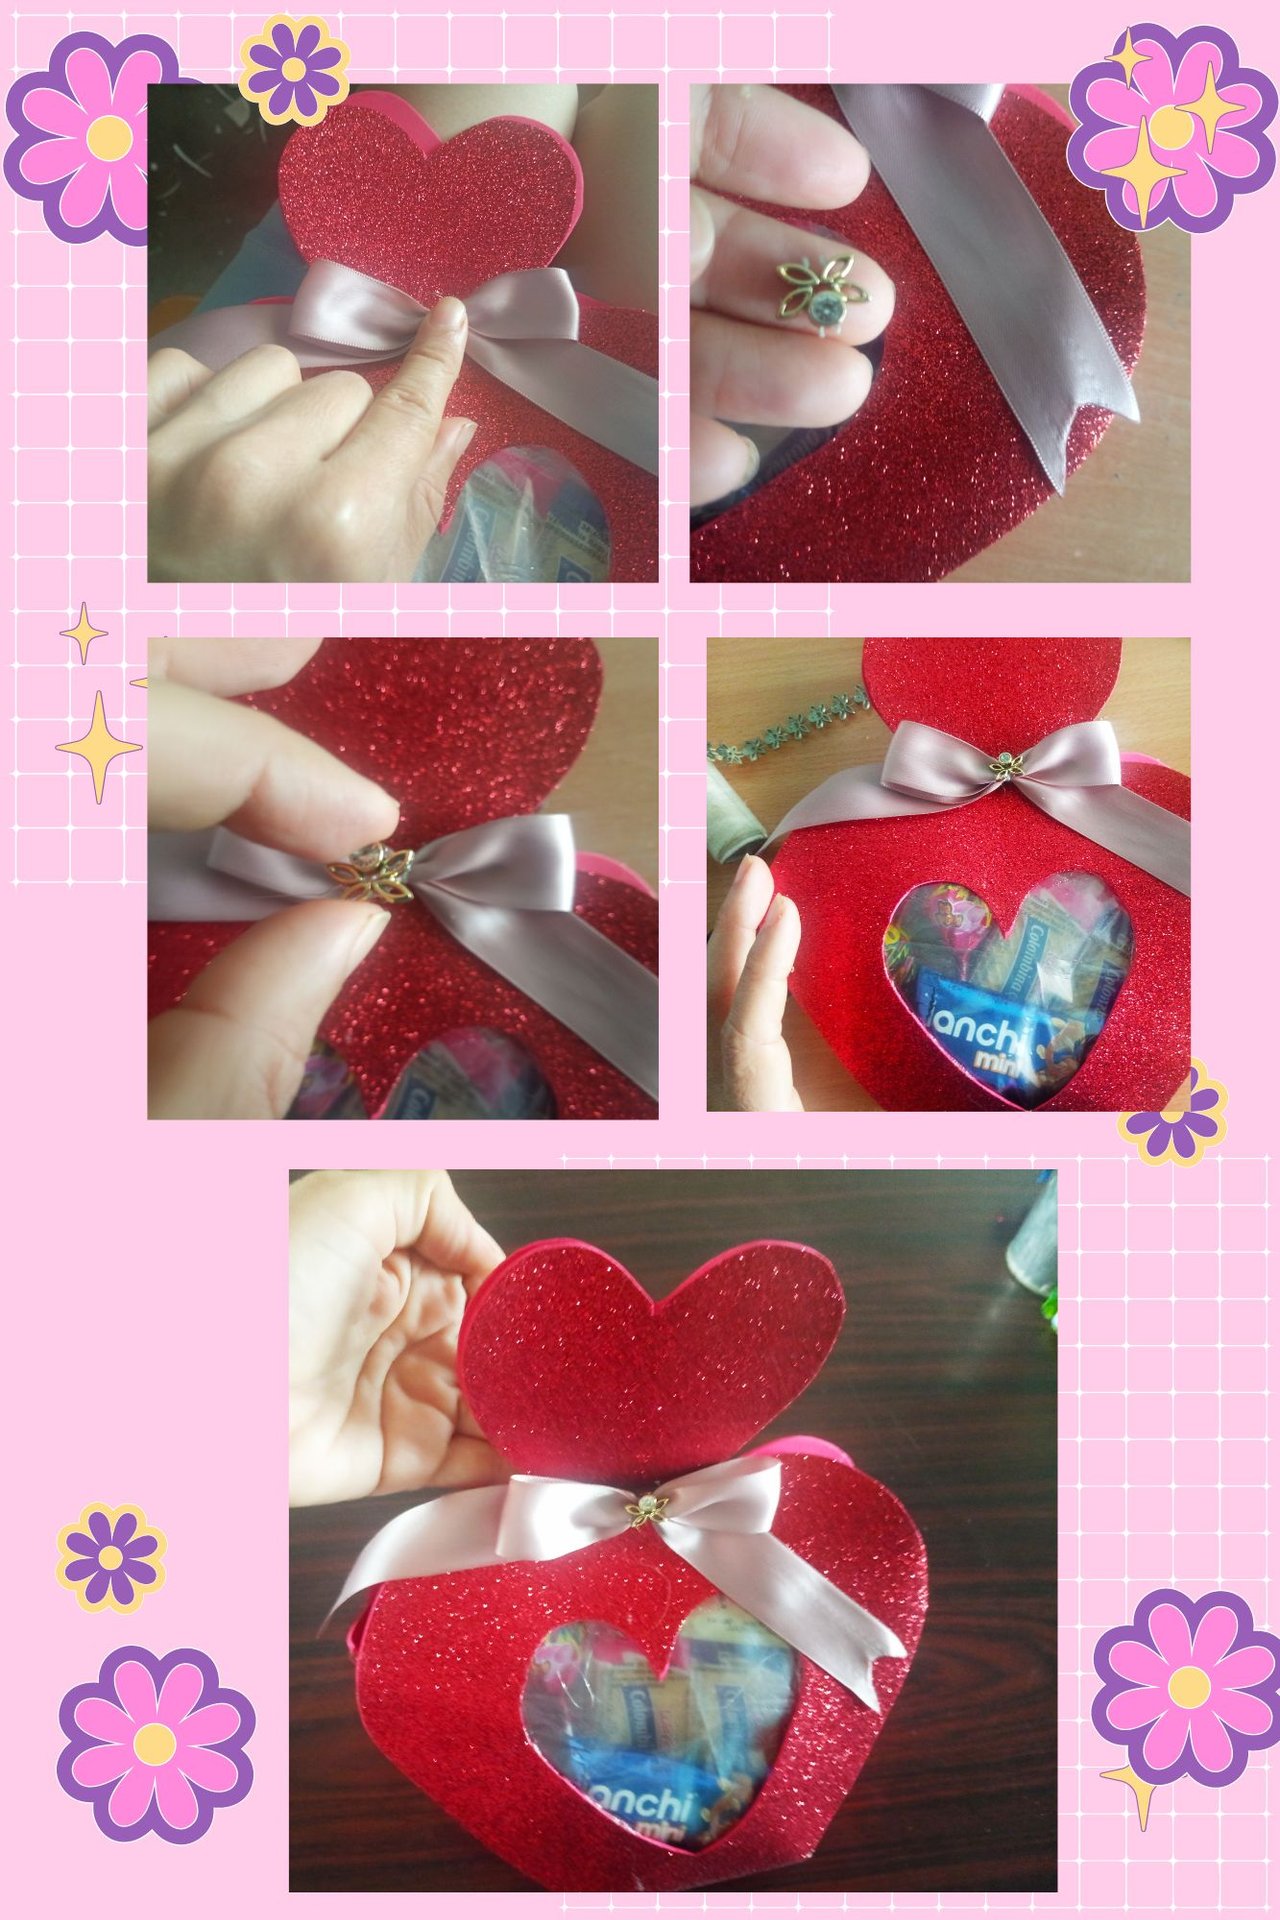
We take our pattern and with the marker we mark the pattern on the foami sheet, in this case as the foami has two sides, one frosted and the other without frosting, we will mark the side without frosting, in this case I use a marker as it has neither graphite nor ink and so the finish is more aesthetic as there will be no trace of ink or graphite.
After marking the image on the foami sheet we proceed to cut it out carefully.
With a ruler I mark the folds and fold, then I glue the sides with silicone.
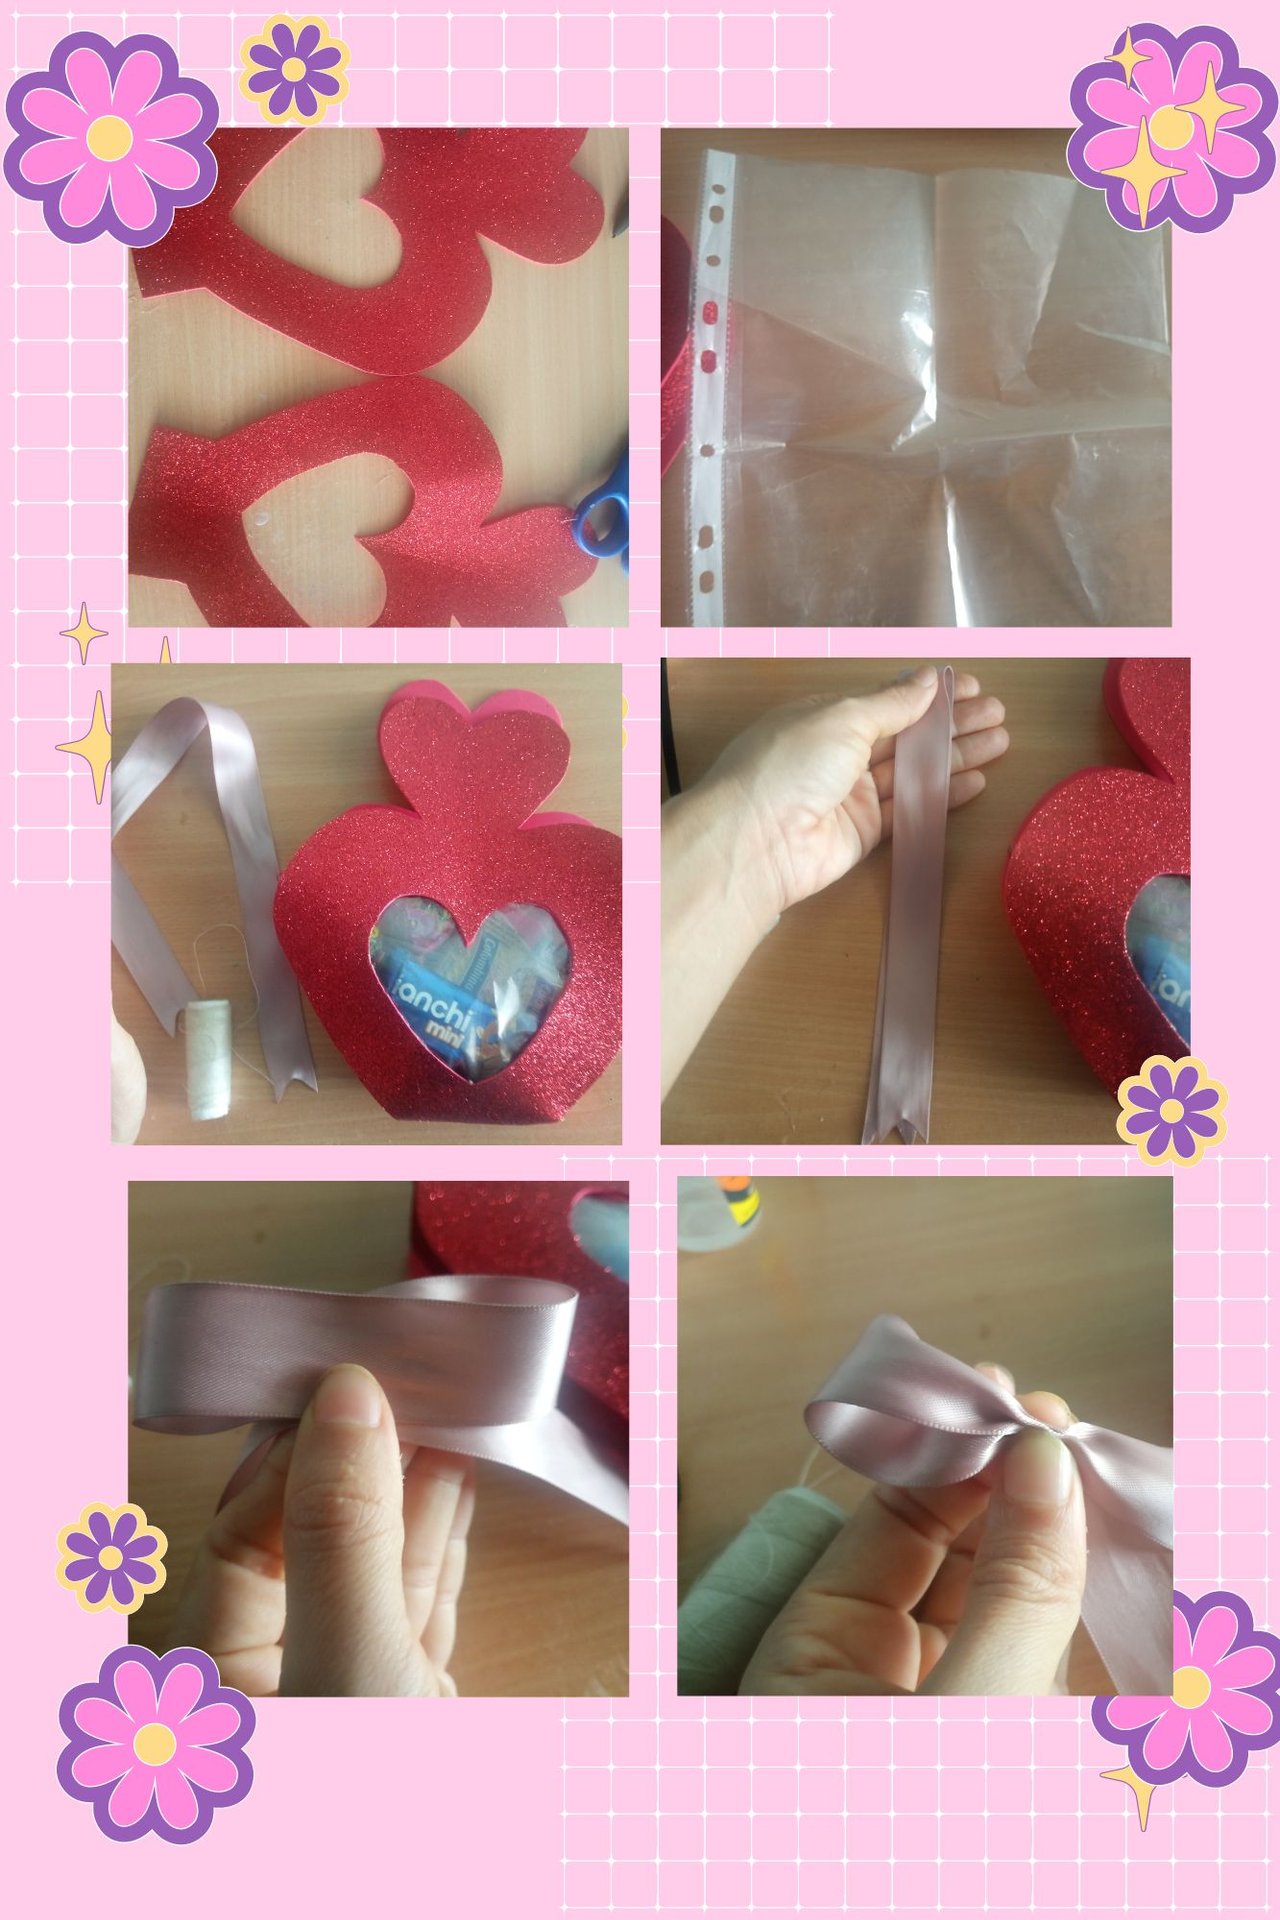
We take in this case a cover, the ideal would be to use an acetate, but in this opportunity I didn't have it, but the cover also fulfils the function, we cut out a square taking into consideration the size of the inner heart and we stick it with silicon.
We make a bow and stick it on a ribbon that will be tied around it-
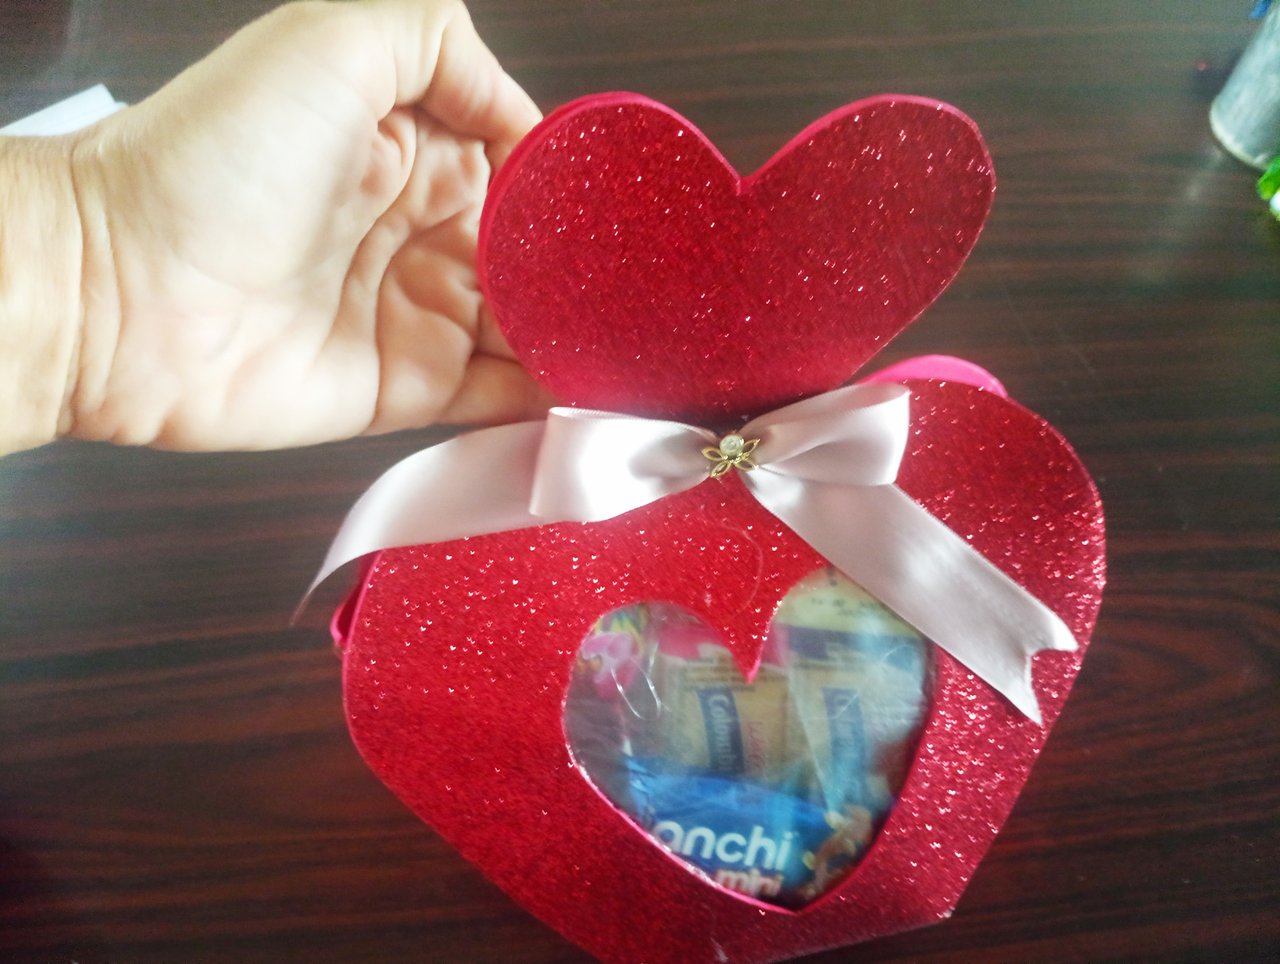
we place an applicator, in this case place one with glitter to make it look nicer, we finish the craft by placing the sweets of our preference and ready, we will have a nice detail to give away.
Well friends I hope you liked the craft that I brought you this time and if you want you are encouraged to do it because few materials are required, well dear creators, see you in a next opportunity with another craft.
Español
Saludos amigos creadores, espero te encuentres bien, hoy les traigo una linda manualidad muy fácil de realizar que se puede utilizar para múltiples propósitos, en esta oportunidad la voy a utilizar para hacer un pequeño obsequio a una mujer, pues bien, a continuación les cuento cuales son los materiales que necesitamos.
Materiales
Una lámina de foami grande
Tijera
Una cinta de raso
Un aplique
Silicon, pistola de silicon.
Patrón
Una funda o acetato
Dulces para rellenar.
Un apuntador para marcar
regla
hilo
Procedimiento
Tomamos nuestro patrón y con el marcador marcamos el patrón en la hoja de foami, en este caso como el foami tiene dos lados, uno escarchado y el otro sin escarchar, marcaremos el lado sin escarchar, en este caso uso un marcador ya que no tiene ni grafito ni tinta y así el acabado es más estético ya que no quedará rastro de tinta o grafito.
Después de marcar la imagen en la hoja de foami procedemos a recortarla con cuidado.
Con una regla marco los pliegues y doblo, después pego los laterales con silicona.
Agarramos en este caso una funda, lo ideal sería usar una hoja de acetato, pero en esta oportunidad no lo tenía, pero la funda también cumple la función, recortamos un cuadrado teniendo en cuenta el tamaño del corazón interior y lo pegamos con silicona.
Hacemos un lazo y lo pegamos en una cinta que irá atada alrededor-.
Bueno amigos espero que les haya gustado la manualidad que les traje en esta oportunidad y si quieren se animen a realizarla ya que se requieren pocos materiales, bueno queridos creadores, nos vemos en una próxima oportunidad con otra manualidad.
Translated with DeepL.com (free version)
Own photographs
.jpg)
Comments