The Build of my New Desktop PC: Assembly Completed! / Assemblaggio Completato! (ENG/ITA)
57 comments
Cover Image: photo of my property: my Desktop Pc
 La versione in italiano è subito dopo la versione in inglese - The Italian version is immediately after the English version

The Build of my New Desktop PC: Assembly Completed!

After more than 12 years of use, I decided to send my (dinosaur) Desktop Pc on vacation to build a new Pc much faster and also quieter.
I shared all the steps of building my new desktop pc on Hive starting from choosing the components to buy to installing the new CPU on the new motherboard.
At the next links below you can read my three previous posts about the building of my new Desktop Pc.
 | c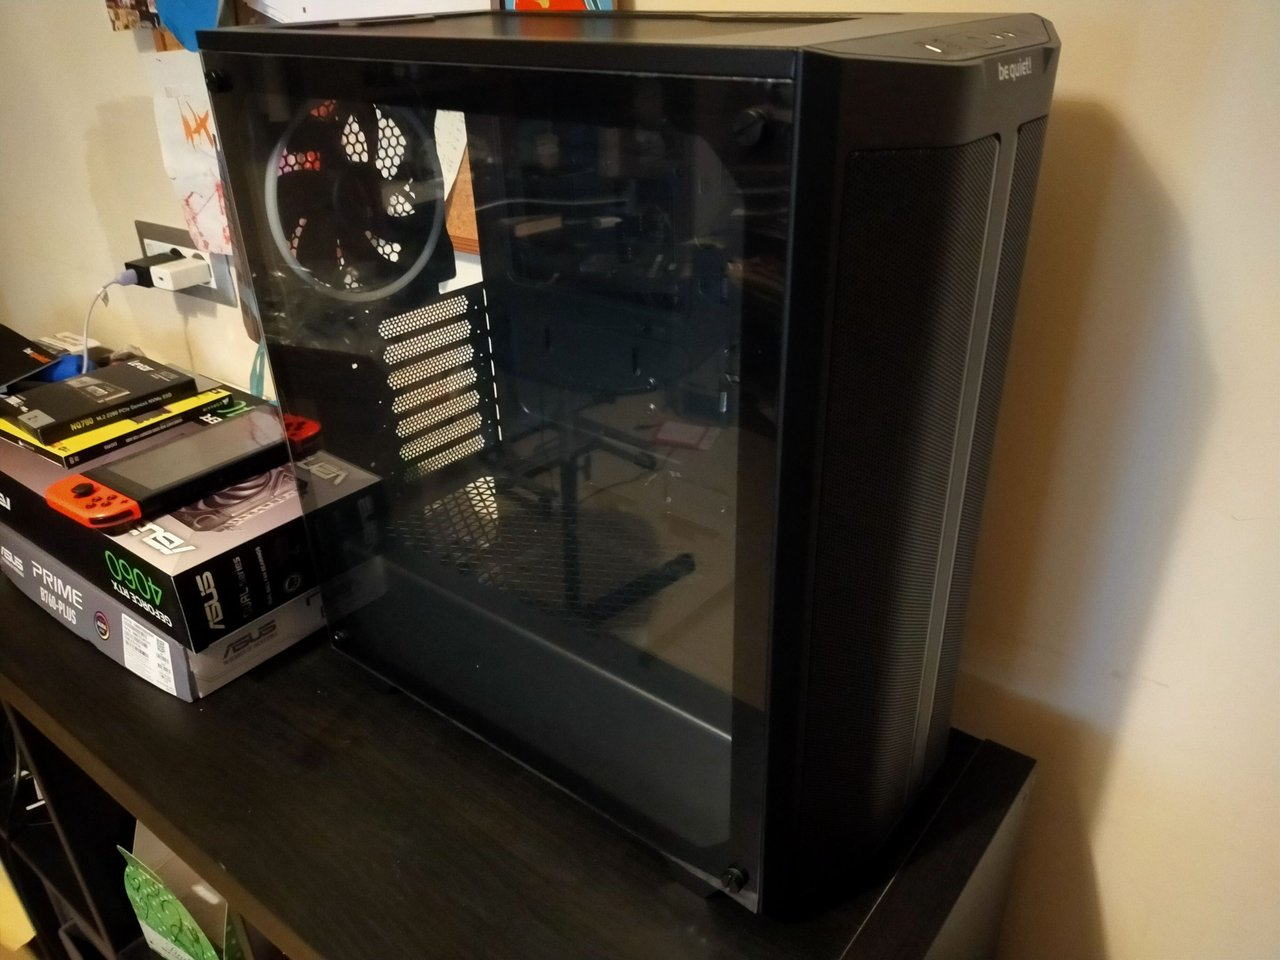 | 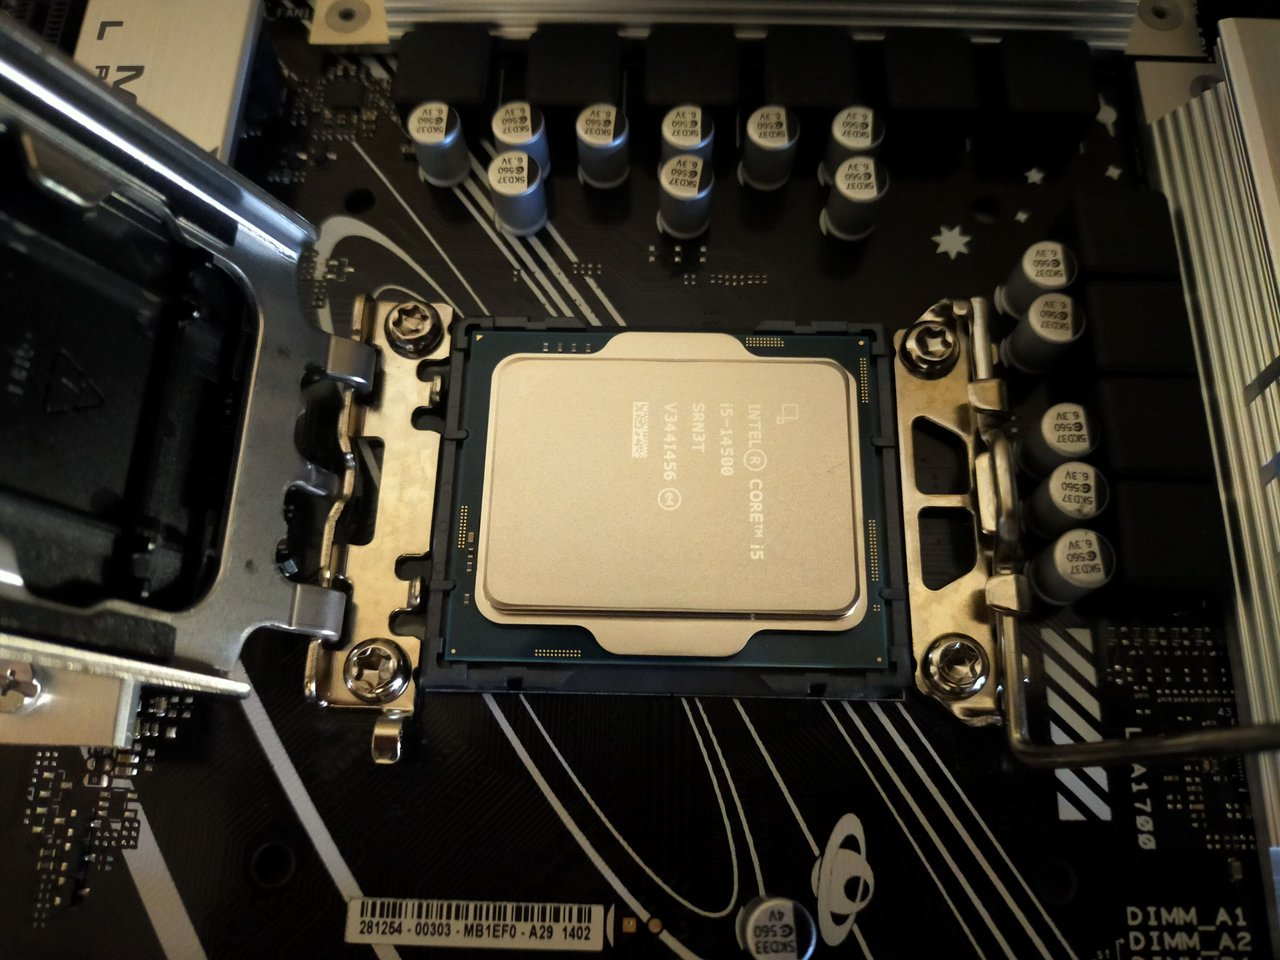 |
|---|---|---|
| Post Link: STEP 1: Choosing components to purchase | Post Link: STEP TWO: Components Purchased! | Post Link: STEP 3: CPU Installation on the Motherboard |
I completed the assembly of my new Desktop Pc 12 days ago, the same day I installed the i5-14500 CPU but since that day I have not had enough free time to write a post and I am doing it today.
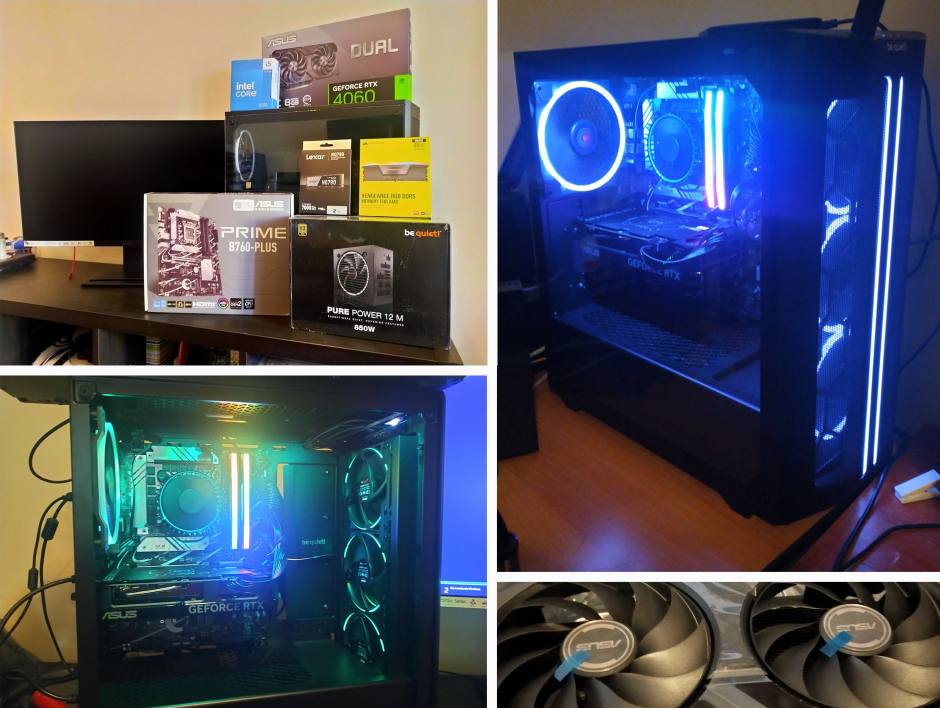
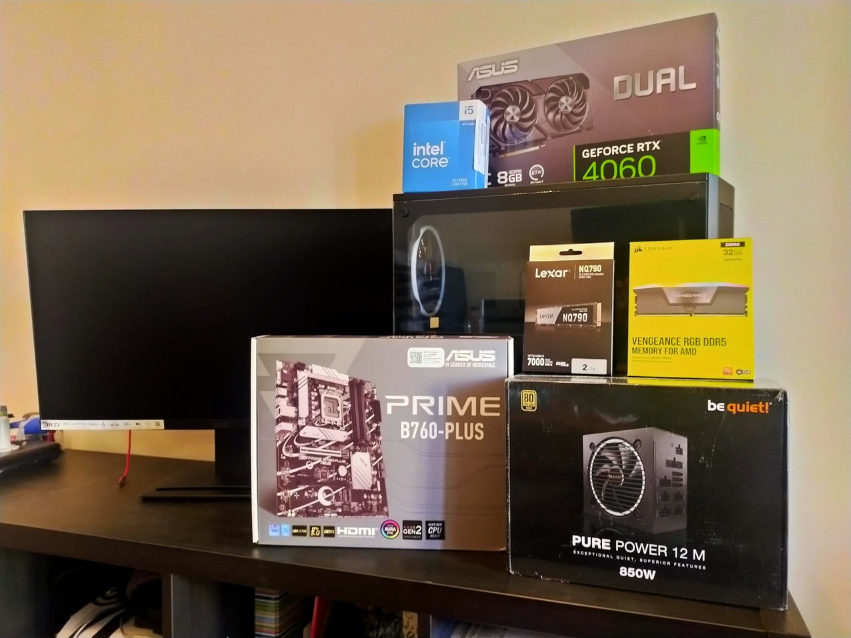
In the next picture you can see all the components I chose for my new Desktop Pc:
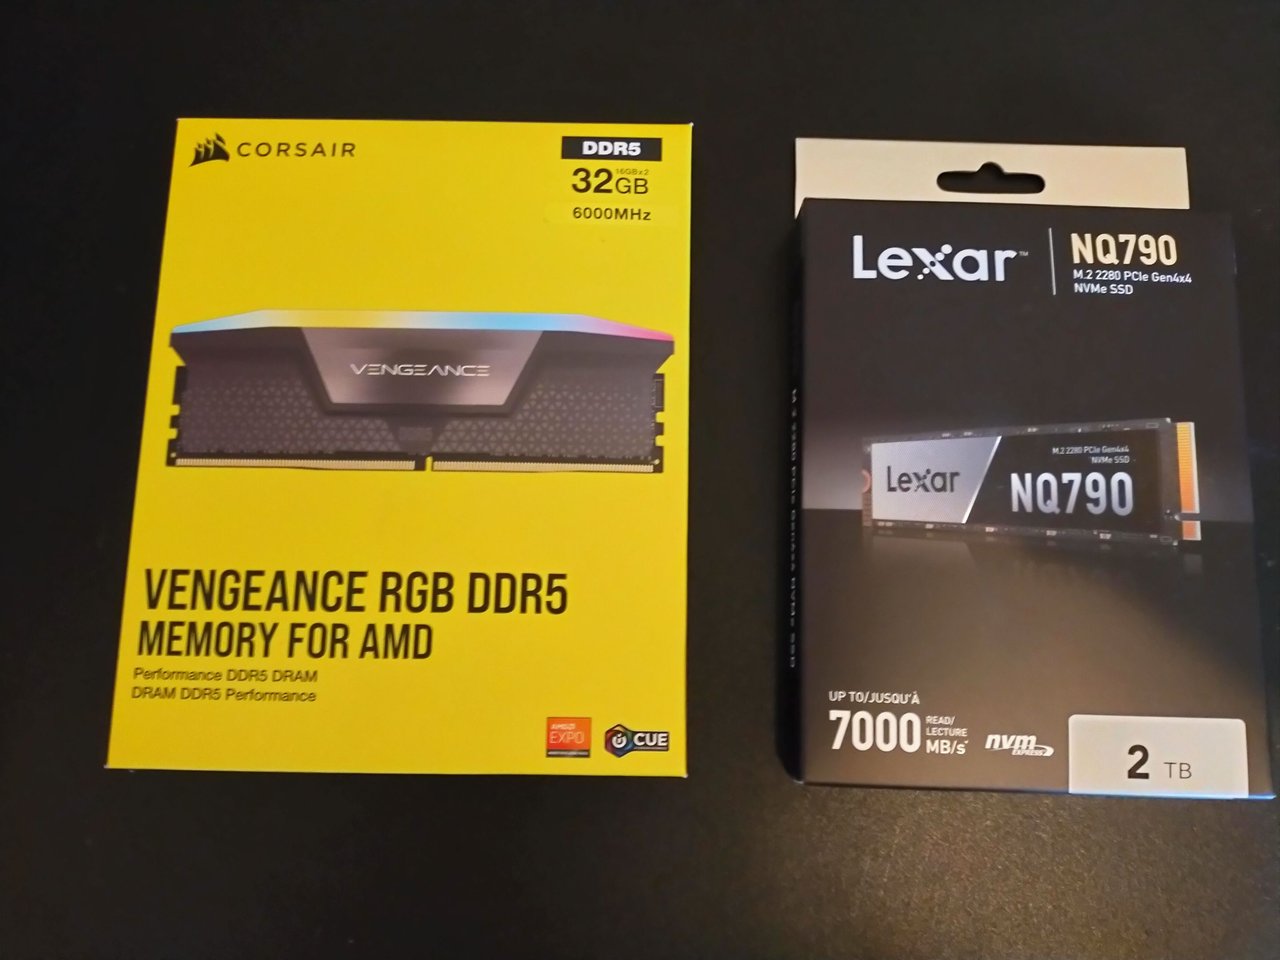
After installing the CPU on the Motherboard, I installed the 4th generation 2 TB Internal M.2 SSD with a read speed of up to 7000 MB/s: Lexar NQ790 2 TB and immediately after that I installed the two 16 GB DDR5 RAM modules: Corsair VENGEANCE RGB DDR5 32GB (2x16GB) 6000MHz C30
The installation of the SSD and RAM was very simple.
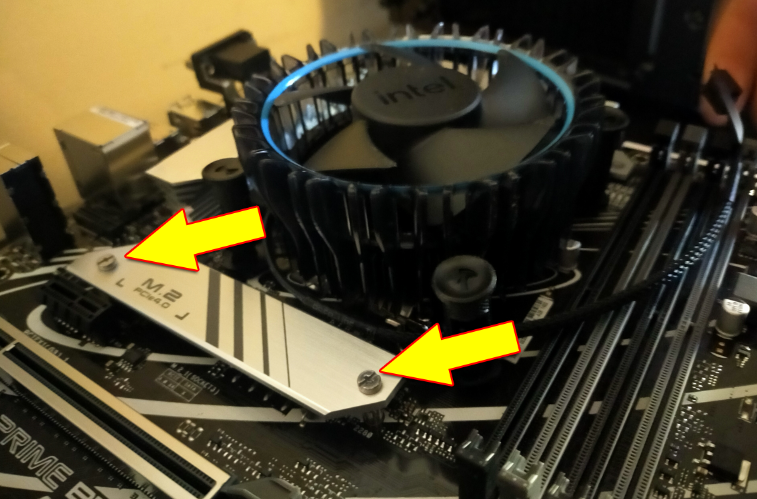
I installed the SSD module in the M.2 slot on the motherboard under the SSD heatsink that you can see in the following picture.
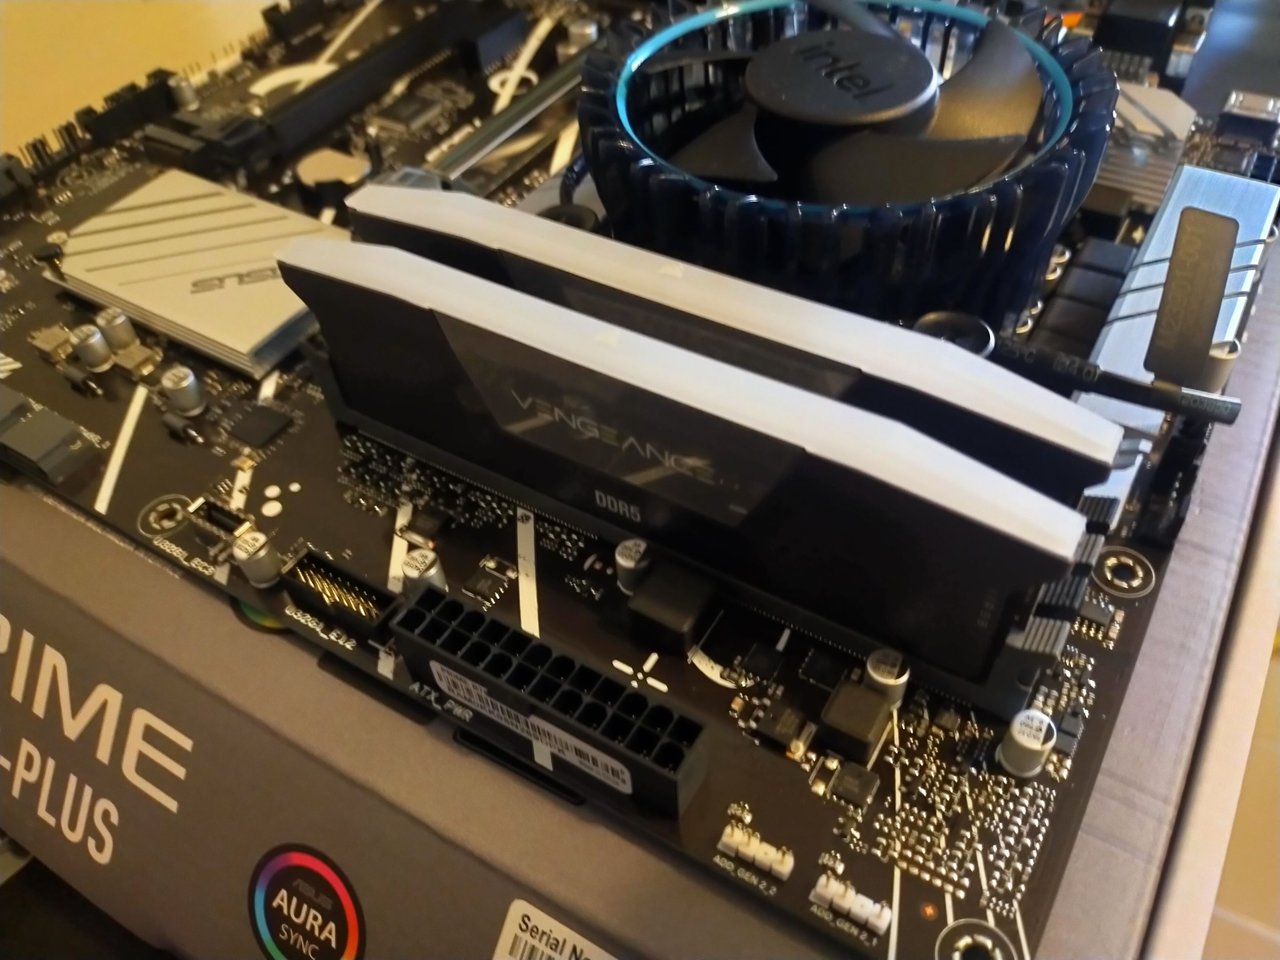
In the following photo you can see the two RAM modules installed in the slots indicated in the motherboard instructions.
In the next step I opened the be quiet! Pure Base 500 FX Black Midi Tower case from which I removed the tempered glass and side panel.
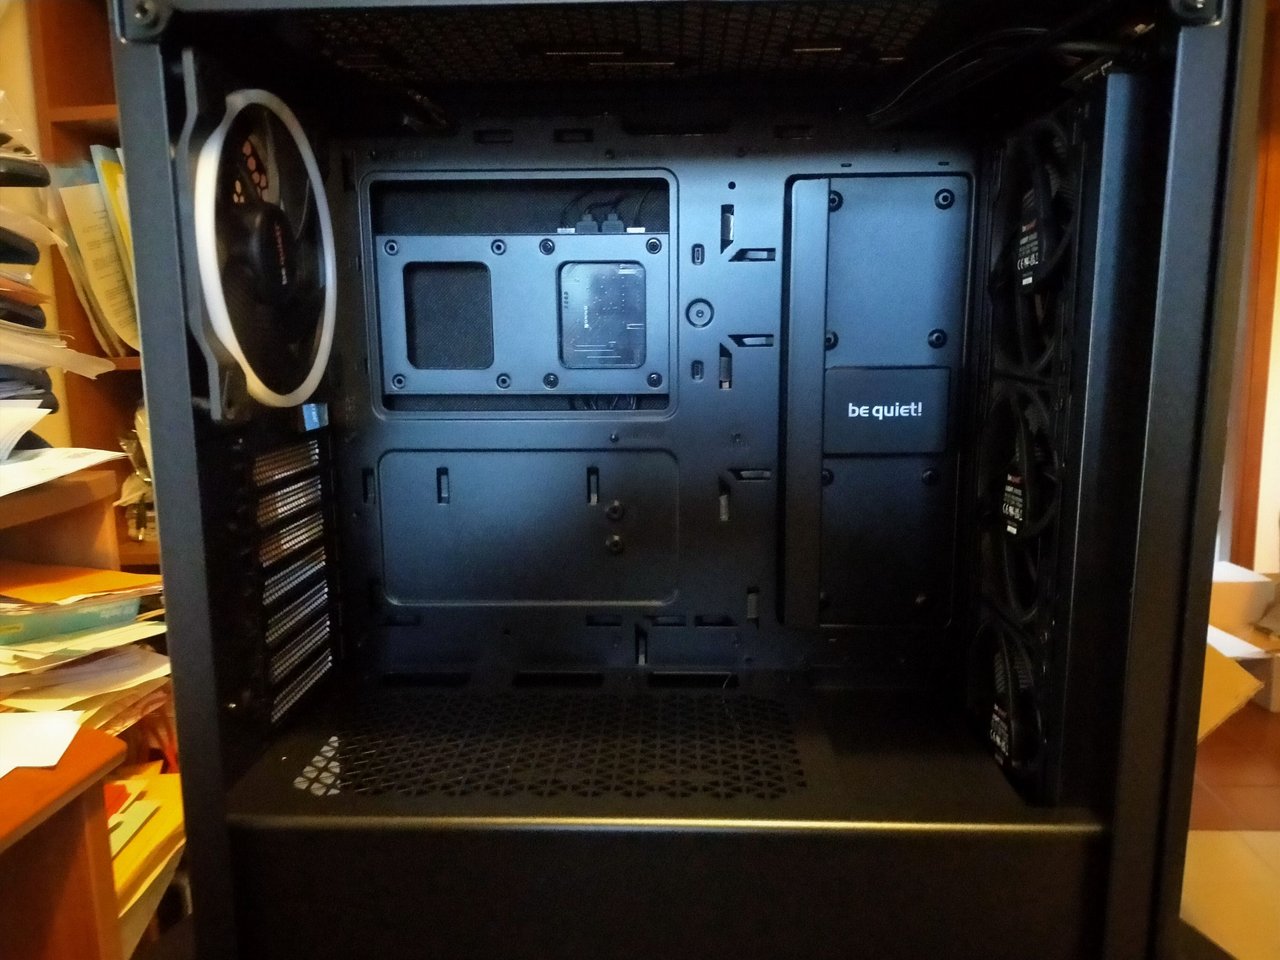
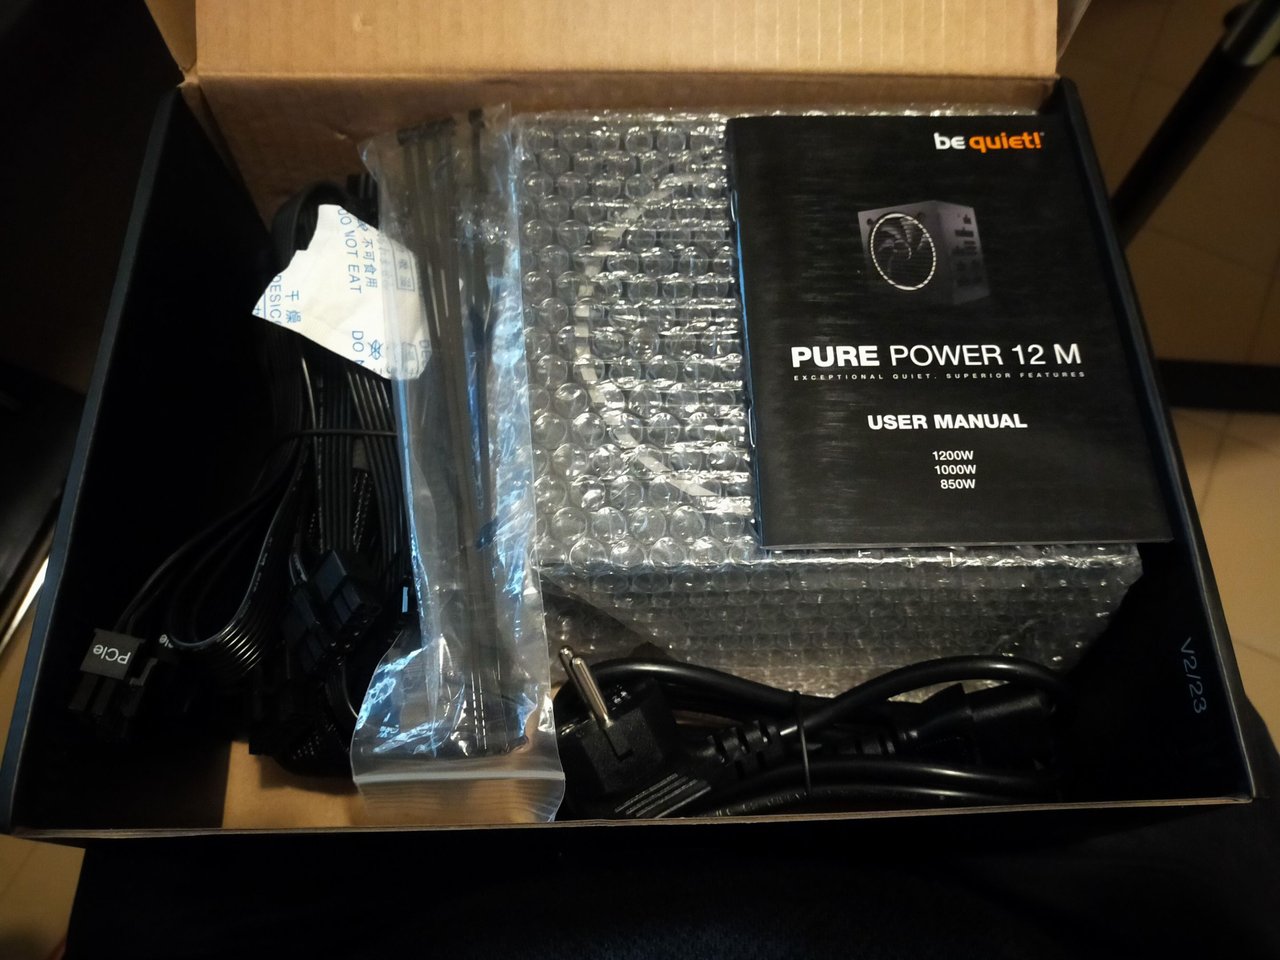
I installed in the case first the modular power supply unit (PSU) be quiet! Pure Power 12 M 850W
Then I took the motherboard and placed it inside the case and attached it to the case by 6 screws.
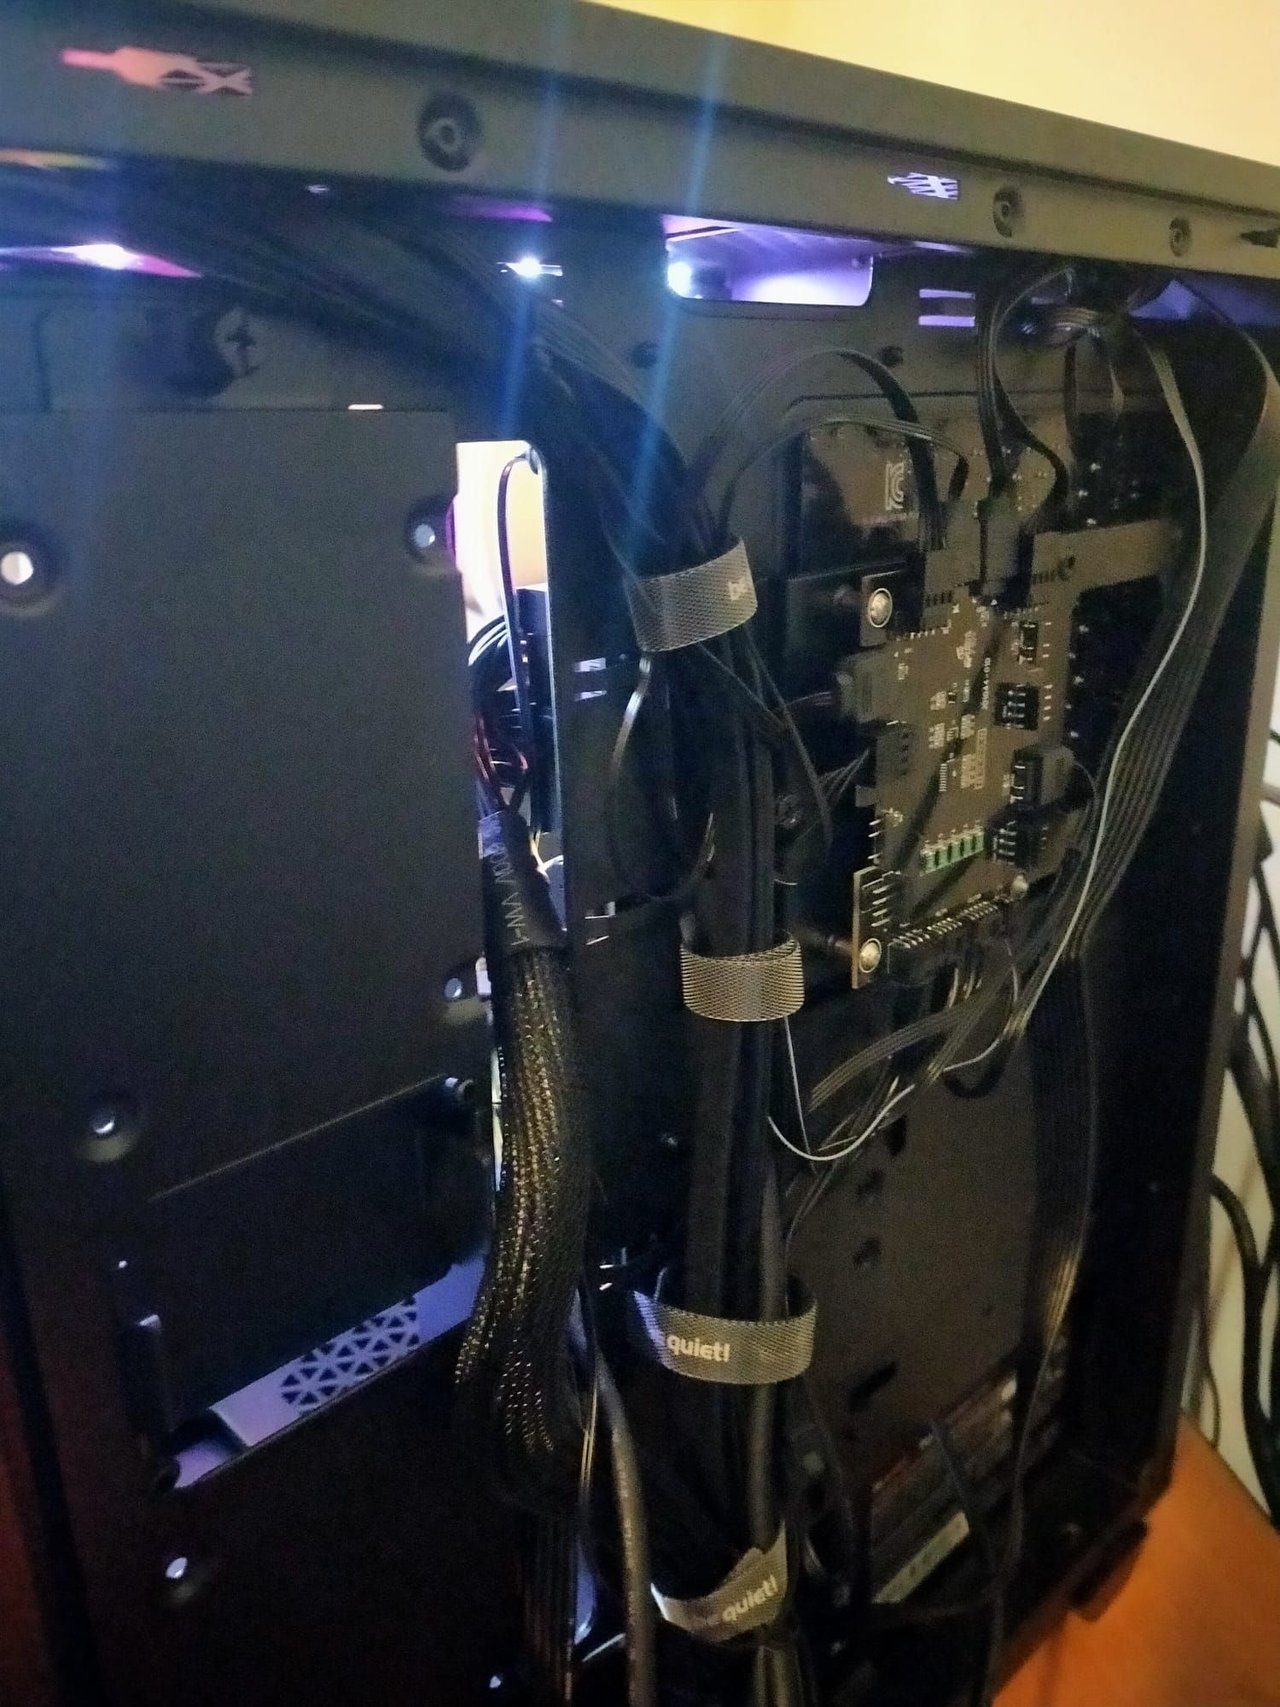
Cable management was really very easy because the case has so much space and has so many easily removable parts.
In addition, the presence of 4 preinstalled fans made the assembly much easier.
In the next picture you can see the side of the case with all the cables collected by convenient cable ties.
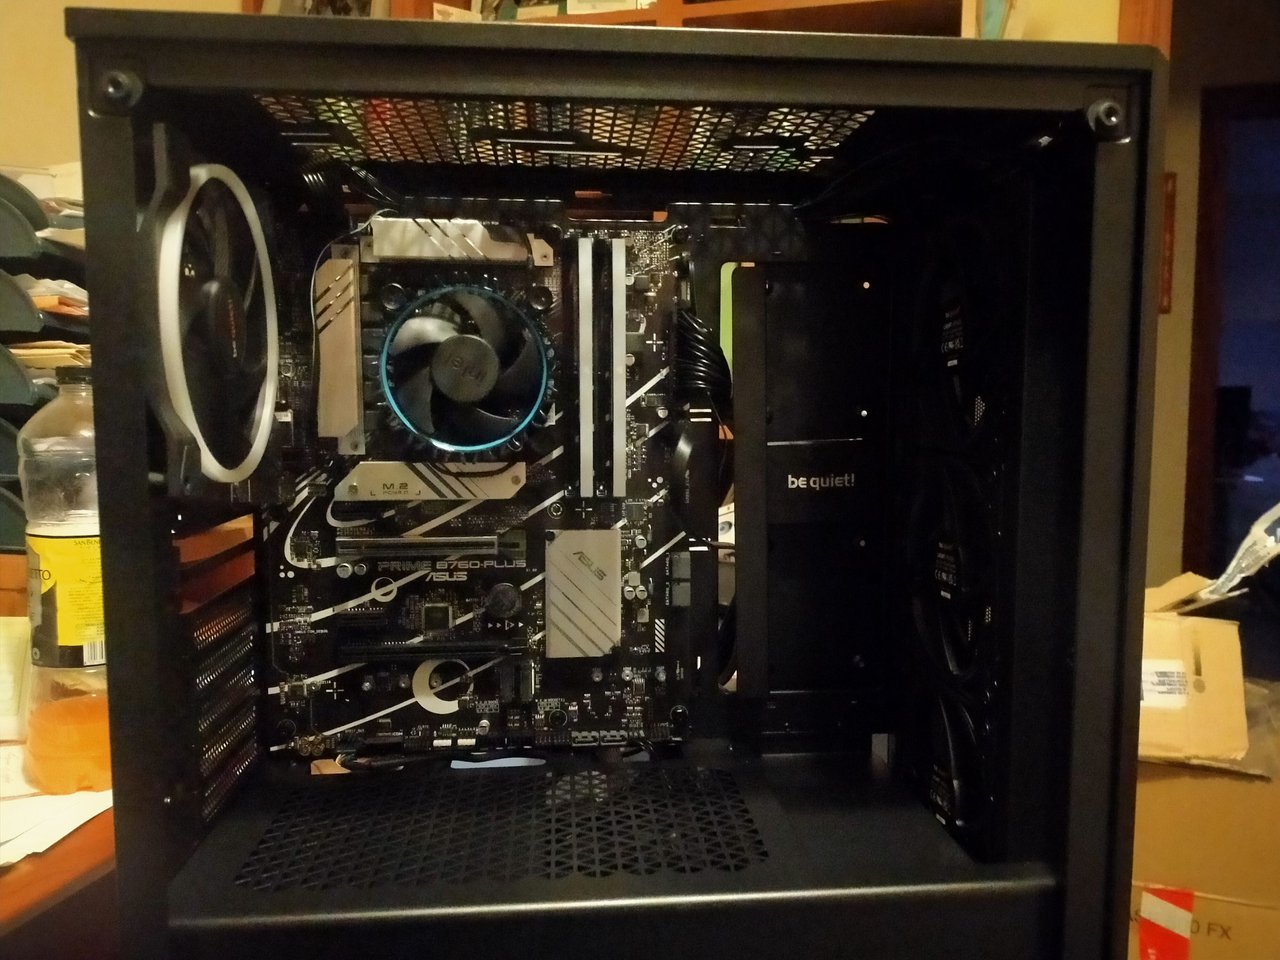
In the next photo you can see the visible part of the case with all components installed except the video card which I left for last.
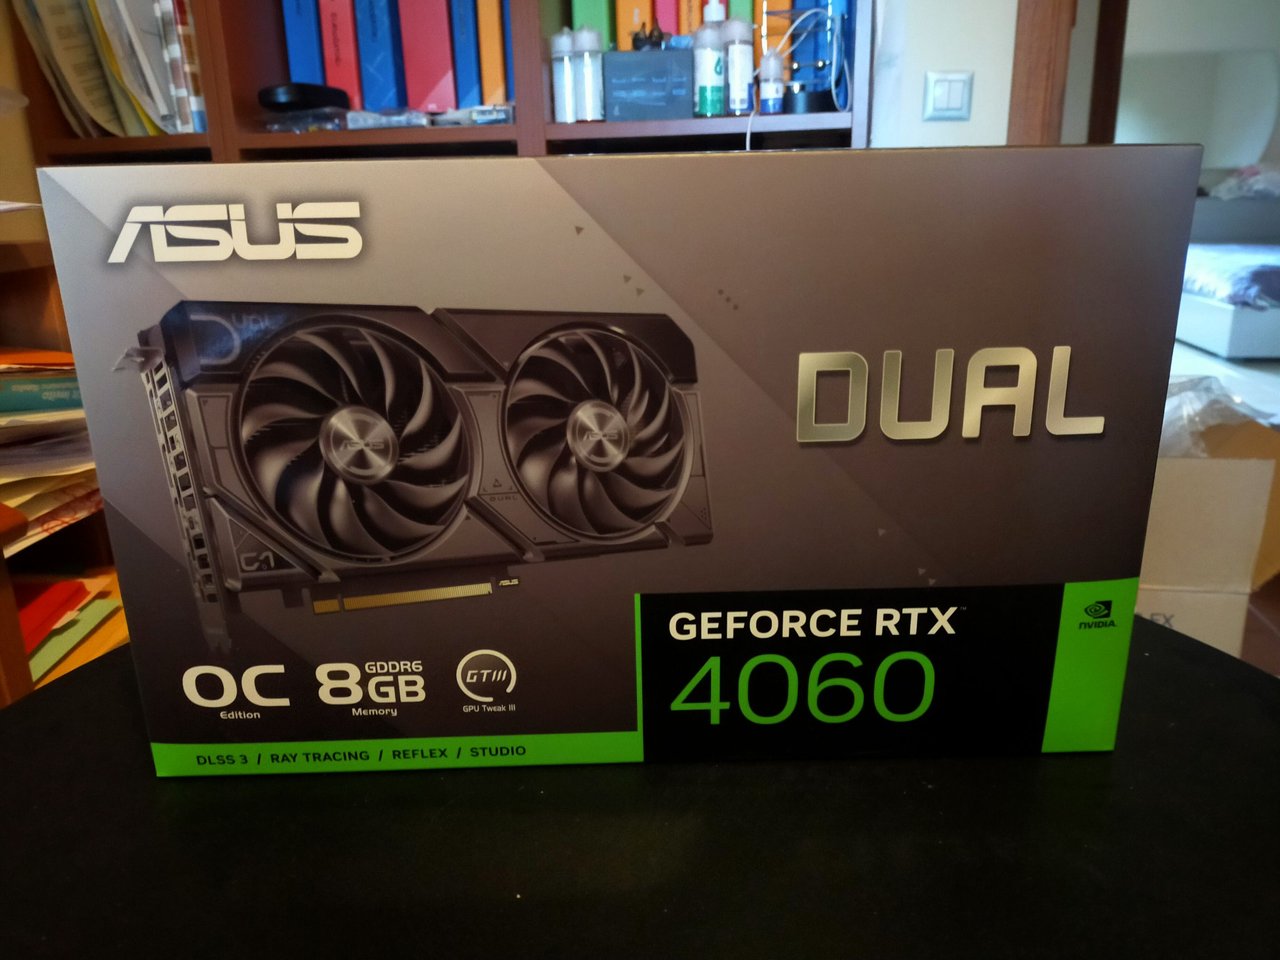
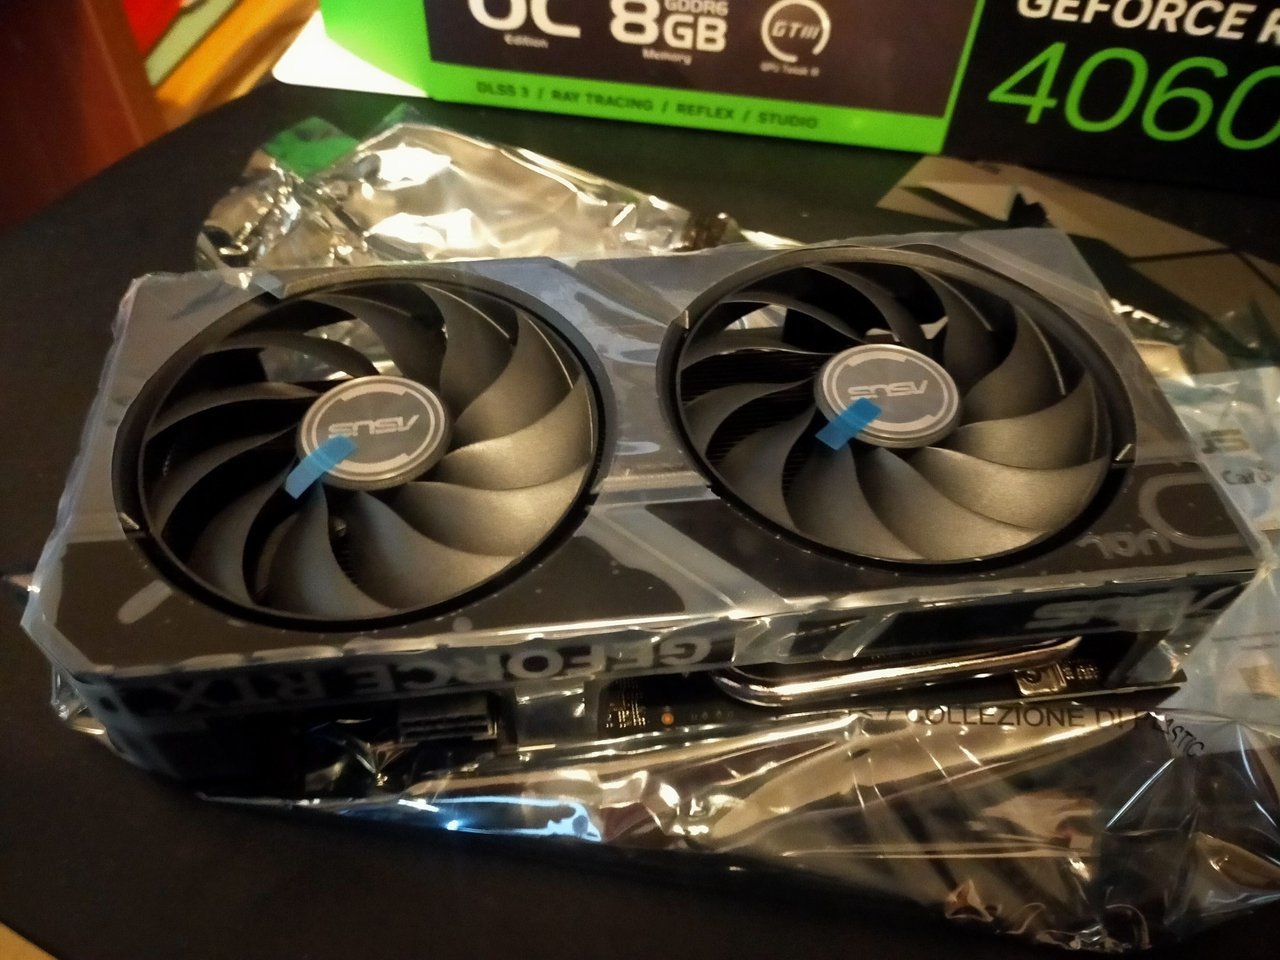
The video card I chose to purchase is the ASUS DUAL NVIDIA GeForce RTX 4060 OC 8 GB GDDR6, which in my opinion has a very good price/performance ratio.
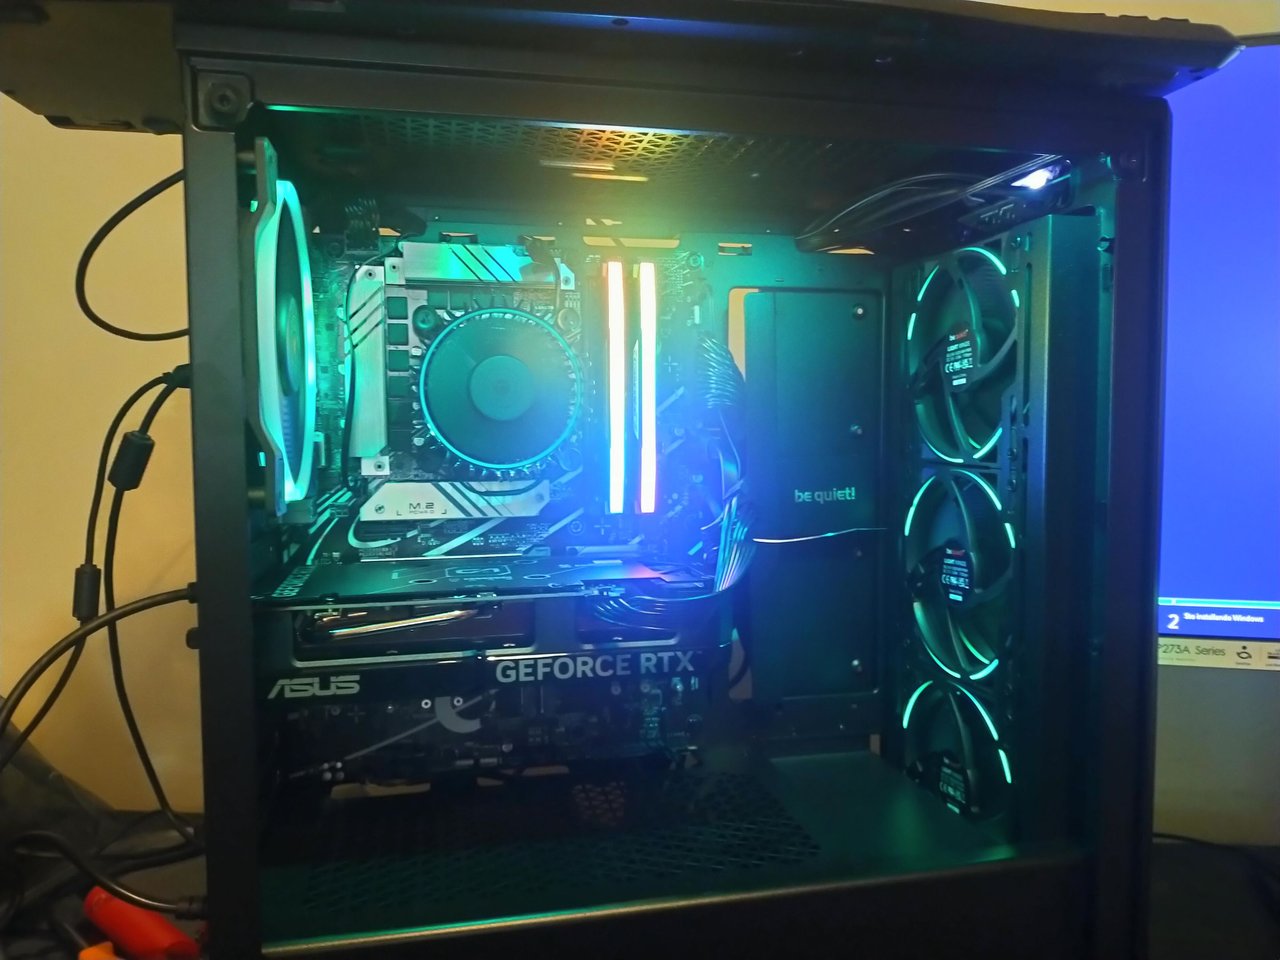
I plugged the video card into the PCI Express 5.0 port and connected the power cable.
In the next picture you can see my new Desktop Pc with the video card installed and at first power up.
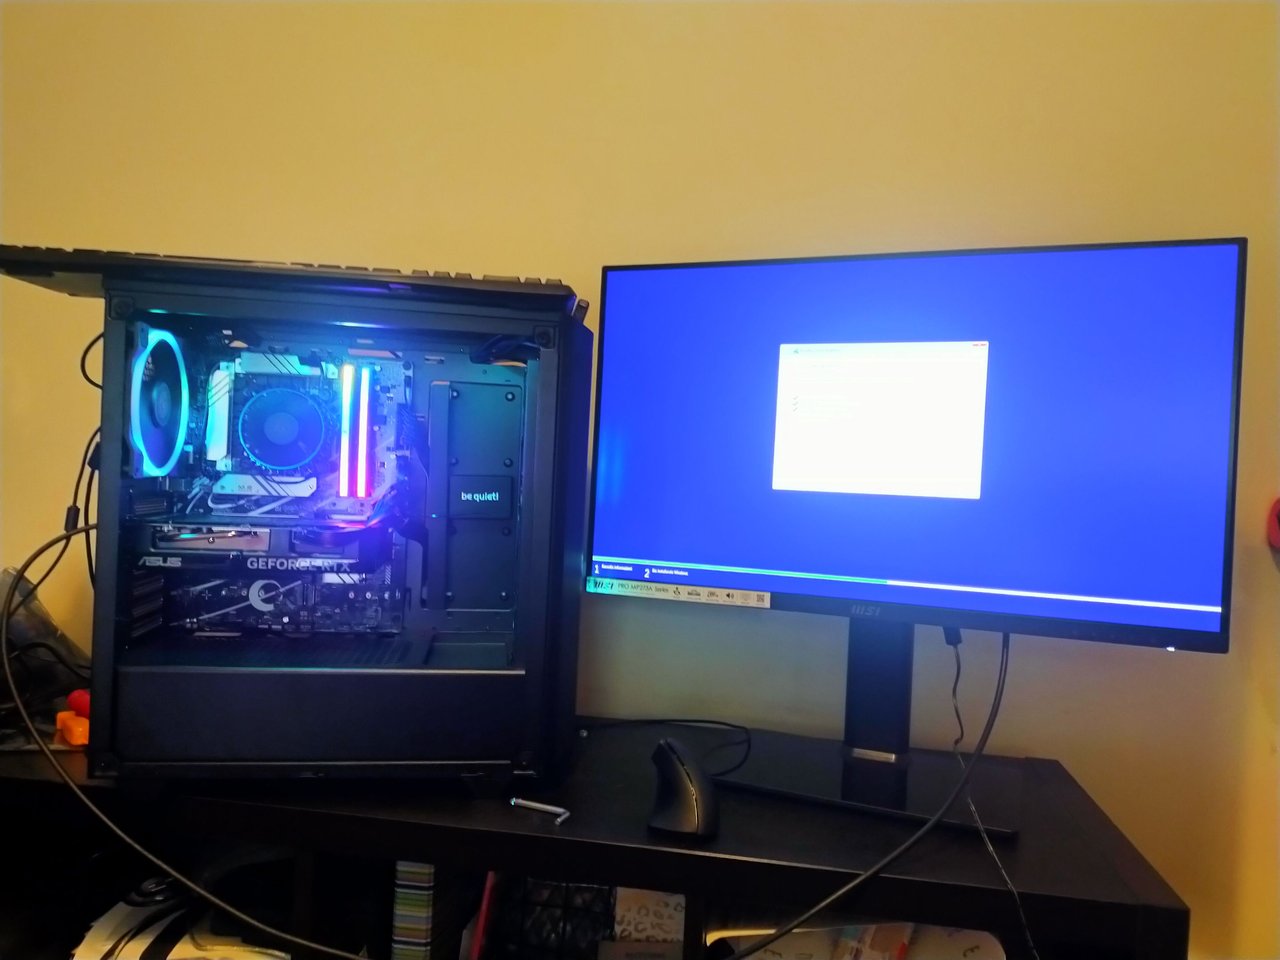
I chose to install Windows 11 Pro which I purchased digitally from an online shop that had many positive reviews.
Everything went smoothly and I was surprised at how quickly Windows was installed.
After installing all the applications I use most I closed the case with the two side panels and placed it on a small table near my desk where I have my printer and modem.
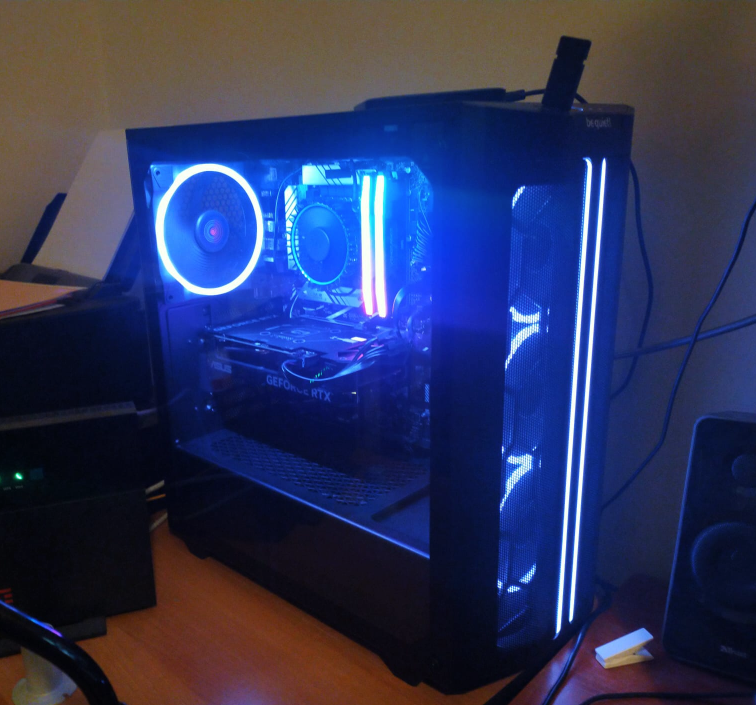
There are many colors that can be chosen for the LEDs but I preferred a single light blue color that changes intensity because that is what I liked best.
Other colors like the rainbow one are too colorful for my personal preference.
I am very happy to finally have a new desktop PC and I think I have taken a big step forward from my old “dinosaur” Desktop PC.
My old “dinosaur” Desktop PC has this configuration:
- CPU: Intel i3-530
- RAM: 6 GB DDR3
- VIDEO: NVIDIA GeForce 9500 GT 1 GB
- HD: SSD 250 GB
- 3 HDDs: 4 terabytes in total
My new Desktop PC has this configuration:
- CPU: Intel i5-14500
- RAM: 32 GB DDR5
- VIDEO: NVIDIA GeForce RTX 4060 OC 8GB
- HD: 2TB M.2 SSD
To build my new desktop PC, I chose components with a special focus on speed and quietness and I am very satisfied with the end result because:
- the quietness of the four fans installed in the case is really good and even if the environment around is absolutely silent I had to strain to hear a slight and almost imperceptible noise coming from my new Pc.
- the increase in speed compared to the old pc is huge.
To make the idea clear, I tried my two pcs, old and new, with a simple multitasking test.
I opened on my old PC a folder of 55 web pages containing the posts section of 55 Hive authors: time taken to open all web pages 2 minutes and 25 seconds.
I opened on my new PC the same folder of 55 web pages containing the posts section of 55 Hive authors: time taken to open all web pages 7 seconds.

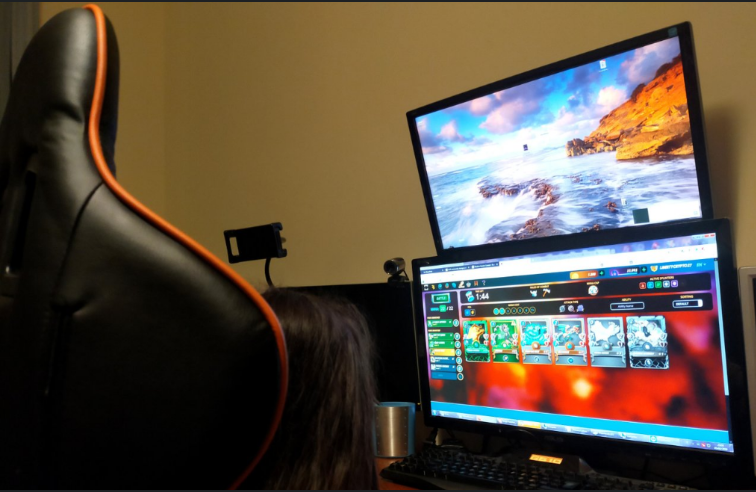
In addition to my new desktop pc I also changed the setup of my monitors.
Before I had two monitors placed one on top of the other now I have four monitors connected to my new video card but I will show my setup in my next post.

La costruzione del mio nuovo PC Desktop: Assemblaggio Completato!
Dopo più di 12 anni di utilizzo ho deciso di mandare in vacanza il mio (dinosaur) Desktop Pc per costruire un nuovo Pc più veloce e anche più silenzioso.
Ho condiviso tutti gli steps della costruzione del mio nuovo desktop pc su Hive partendo dalla scelta dei componenti fino all'installazione della nuova CPU sulla nuova motherboard.
Ai link seguenti puoi leggere i miei tre precedenti post sulla costruzione del mio nuovo Desktop Pc.
| c | |
|---|---|---|
| Post Link: STEP 1: Choosing components to purchase | Post Link: STEP TWO: Components Purchased! | Post Link: STEP 3: CPU Installation on the Motherboard |
Ho completato l'assemblaggio del mio nuovo Desktop Pc 12 giorni fa, lo stesso giorno in cui ho installato la CPU i5-14500 ma da quel giorno non ho avuto sufficiente tempo libero per scrivere un post e lo faccio oggi.
Nell'immagine seguente puoi vedere tutti i componenti che ho scelto per il mio nuovo Desktop Pc:
Dopo aver installato la CPU sulla Motherboard ho installato il SSD Interno M.2 da 2 TB di 4 generazione con una velocità di lettura fino a 7000 MB/s: Lexar NQ790 2 TB e subito dopo ho installato i due moduli RAM DDR5 da 16 GB: Corsair VENGEANCE RGB DDR5 32GB (2x16GB) 6000MHz C30
L'installazione del SSD e della RAM è stata molto semplice
Ho installato il modulo SSD nell'alloggiamento M.2 sulla motherboard sotto al dissipatore per SSD che puoi vedere nella foto seguente.
Nella foto seguente puoi vedere i due moduli RAM installati negli alloggiamenti indicati nelle istruzioni della scheda madre.
Nel passo successivo ho aperto il case be quiet! Pure Base 500 FX Black Midi Tower da cui ho rimosso il vetro temperato e il pannello laterale.
Ho installato nel case prima l'alimentatore (PSU) modulare be quiet! Pure Power 12 M 850W
Poi ho preso la motherboard e l'ho posizionata all'interno del case e l'ho fissata al case tramite 6 viti.
Il cable management è stato davvero molto semplice perchè il case ha tanto spazio e ha tante parti rimovibili facilmente.
Inoltre la presenza di 4 ventole preinstallate ha semplificato molto l'assemblaggio.
Nella foto seguente puoi vedere la parte laterale del case con tutti i cavi raccolti da comode fascette a strappo.
Nella foto seguente puoi vedere la parte visibile del case con tutti i componenti installati tranne la scheda video che ho lasciato per ultimo.
La scheda video che ho scelto di acquistare è la ASUS DUAL NVIDIA GeForce RTX 4060 OC 8 GB GDDR6 che secondo me ha un ottimo rapporto qualità/prezzo.
Ho inserito la scheda video nella porta PCI Express 5.0 e ho collegato il cavo di alimentazione.
Nella foto successiva puoi vedere il mio nuovo Desktop Pc con la scheda video installata e alla prima accensione.
Ho scelto di installare Windows 11 Pro che ho acquistato in digitale da uno shop online che aveva molte recensioni positive.
Tutto è andato liscio come l'olio e sono rimasto sorpreso dalla velocità con cui Windows è stato installato.
Dopo aver installato tutte le applicazioni che uso di più ho chiuso il case con i due pannelli laterali e l'ho posizionato su un tavolino vicino alla mia scrivania dove ho la stampante e il modem.
Ci sono tante colorazioni sceglibili per i led ma io ho preferito un colore singolo azzurro chiaro che cambia intensità perchè è quello che mi è piaciuto di più. Altre colorazioni come quella arcobaleno sono troppo colorate per i miei gusti.
Sono molto contento di avere finalmente a disposizione un nuovo desktop PC e penso di aver fatto un grosso passo in avanti rispetto al mio vecchio "dinosaur" Desktop PC.
Il mio vecchio "dinosaur" Desktop PC ha la seguente configurazione:
- CPU: Intel i3-530
- RAM: 6 GB DDR3
- VIDEO: NVIDIA GeForce 9500 GT 1 GB
- HD: SSD 250 GB
- 3 HDD: 4 Terabyte in totale
Il mio nuovo Desktop PC ha la seguente configurazione:
- CPU: Intel i5-14500
- RAM: 32 GB DDR5
- VIDEO: NVIDIA GeForce RTX 4060 OC 8GB
- HD: 2TB M.2 SSD
Per costruire il mio nuovo desktop PC ho scelto i componenti con un focus particolare su velocità e silenziosità e sono molto soddisfatto del risultato finale perchè:
- la silenziosità delle quattro ventole installate nel case è davvero ottima, devo avere l'ambiente circostante in assoluto silenzio e devo sforzarmi per sentire un lieve e quasi impercettibile rumore proveniente dal mio nuovo Pc.
- l'aumento della velocità rispetto al vecchio pc è enorme.
Per rendere l'idea ho provato i miei due pc, vecchio e nuovo, con un semplice test da multitasking.
Ho aperto sul mio vecchio PC una cartella di 55 pagine web contenenti la sezione posts di 55 autori di Hive: tempo impiegato per aprire tutte le pagine web 2 minuti e 25 secondi.
Ho aperto sul mio nuovo PC la stessa cartella di 55 pagine web contenenti la sezione posts di 55 autori di Hive: tempo impiegato per aprire tutte le pagine web 7 secondi.
Oltre al mio nuovo desktop pc ho anche modificato il setup dei miei monitor.
Prima avevo due monitor posizionati uno sopra l'altro adesso ho quattro monitor collegati alla mia nuova scheda video ma mostrerò il mio setup in un mio prossimo post.

Posted Using InLeo Alpha
Comments